Home recording is a popular and rewarding hobby for many music enthusiasts. Whether you want to record your own songs, cover your favorite artists, or produce podcasts, home recording can help you express your creativity and share it with the world.
However, home recording is not as easy as it sounds. There are many challenges and pitfalls that can ruin your recordings and make them sound amateurish. If you want to achieve professional-quality audio in your home studio, you need to avoid some common home recording mistakes that many beginners make.
In this blog post, we will reveal the three most serious mistakes that almost every home studio enthusiast commits while recording at home or in a specific room. These mistakes can affect the vocal dynamics, the noise level, and the overall quality of your recordings. We will also show you how to avoid these mistakes by following a simple and effective formula that will help you get high-quality audio with dynamic depth.
By the end of this post, you will learn how to avoid the most common home recording mistakes and improve your recordings with the HSS Formula.
Are you ready to learn how to record like a pro in your home studio? Then let’s get started!
Mistake #1: Reading a Copy of the Song Lyrics While Recording
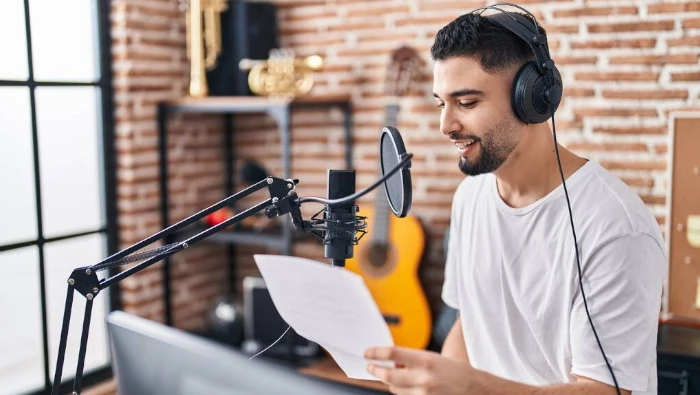
One of the most common and serious mistakes that home studio enthusiasts make is reading a copy of the song lyrics while recording. This may seem like a convenient way to avoid forgetting the words or making mistakes, but it actually has a negative impact on the vocal performance and the emotion of the song.
When you read the lyrics from a sheet of paper or a screen, you are not singing from your heart, but from your head. You are employing logic, not embracing poetry. Your attention is directed toward the words, neglecting the melody. Instead of expressing your own thoughts, you are reciting someone else’s words.
This affects the vocal dynamics, which is the variation of loudness, pitch, tone, and timbre of your voice. Vocal dynamics are essential for creating contrast, tension, and emotion in your singing. When you read the lyrics, you tend to sing in a monotone, flat, and boring way. The natural inflections, accents, and nuances of your voice are lost. Rather than sounding like a human, you come across more like a robot.
Reading the lyrics also affects the emotion of the song, which is the feeling or mood that you want to convey to the listeners. Emotion is what makes a song memorable, relatable, and engaging. When you read the lyrics, you are not connecting with the message or the story of the song. You’re not stepping into the shoes of the character or the situation. There’s a lack of passion, enthusiasm, or empathy in your expression. Instead of sounding like a friend, your tone comes across more like that of a stranger.
How can you avoid this mistake and improve your vocal dynamics and emotion? Here are some tips:
- Memorize the lyrics. This may seem obvious, but it is the most effective way to sing with expression and confidence. Memorizing the lyrics will free your mind from reading and allow you to focus on singing. It will also help you to remember the melody, the rhythm, and the structure of the song. To memorize the lyrics, you can use different techniques, such as repetition, association, visualization, or mnemonics.
- Practice singing with expression. Before you record, you should practice singing the song with different emotions and styles. You can try to sing it as if you were happy, sad, angry, or surprised. You can also try to sing it as if you were a different singer, such as Adele, Bruno Mars, or Ed Sheeran. This will help you to explore the possibilities and potential of your voice. It will also help you to find the best way to express the emotion of the song.
- Record yourself and listen back. Another way to improve your vocal dynamics and emotion is to record yourself singing the song and listen back to it. This will help you to evaluate your performance and identify your strengths and weaknesses. You can also compare your recording to the original song or to other singers’ versions and see how they differ. You can then use this feedback to improve your singing and make it more dynamic and emotional.
Mistake #2: Not Using Electrical Grounding On Equipment

Another common and serious mistake that home studio enthusiasts make is not using electrical grounding on their equipment. Electrical grounding is the process of connecting the metal parts of an electrical device or circuit to the earth. This provides a safe path for excess or unwanted electric current to flow away from the device or circuit.
Why is electrical grounding important for home recording? Because it can prevent noise and interference from electromagnetic radiations. Electromagnetic radiations are waves of energy that travel through space and matter. They can be produced by natural sources, such as the sun, the earth, or the stars, or by artificial sources, such as power lines, radio stations, or cell phones.
Electromagnetic radiations can interfere with the signals of your audio equipment, such as microphones, cables, mixers, or speakers. They can cause unwanted sounds, such as hums, buzzes, clicks, or pops, that can ruin your recordings. They can also damage your equipment, such as by causing overheating, short circuits, or sparks.
How can you avoid this mistake and prevent noise and interference from electromagnetic radiations? Here are some tips:
- Use electrical grounding on your equipment. This is the most effective way to protect your equipment and your recordings from noise and interference. Electrical grounding will divert the excess or unwanted electric current away from your equipment and into the earth. This will reduce the chances of electromagnetic radiations affecting your signals. To use electrical grounding, you need to install a good grounding system for your recording studio. You can do this by calling a professional electrician or by following some online tutorials .
- Use balanced cables and connectors. Balanced cables and connectors are designed to cancel out the noise and interference that may affect the signals. They do this by using two wires that carry the same signal but with opposite polarity. When the signals reach the destination, they are subtracted from each other, leaving only the original signal. Balanced cables and connectors are usually marked with an XLR or TRS symbol. You should use them whenever possible for your audio equipment.
- Keep your equipment away from sources of electromagnetic radiations. Another way to prevent noise and interference is to keep your equipment away from sources of electromagnetic radiations. You should avoid placing your equipment near power lines, transformers, fluorescent lights, computers, or wireless devices. You should also use shielded cables and metal cases for your equipment to block the electromagnetic radiations from entering your signals.
These are some of the ways to avoid the second mistake of not using electrical grounding on your equipment. By following these tips, you can improve the quality and clarity of your recordings and protect your equipment from damage.
Mistake #3: Not Following a Formula
The third and final mistake that home studio enthusiasts make is not following a formula for recording, mixing, and mastering. A formula is a set of rules, guidelines, or steps that help you achieve a specific goal or result. A formula can simplify the process, save time, and ensure quality and consistency.
Why is following a formula important for home recording? Because it can help you get high-quality audio with dynamic depth that follows industry standards. Dynamic depth is the perception of distance and space in a sound. It is created by using different levels of volume, frequency, and effects for different elements of the sound. Industry standards are the norms and expectations that professional audio engineers and producers follow to create and deliver audio products.
When you don’t follow a formula, you are relying on trial and error, intuition, or guesswork. This can lead to poor-quality audio that lacks dynamic depth and does not meet industry standards. Your audio may sound too loud, too quiet, too bright, too dull, too dry, or too wet. It may also have unwanted noises, distortions, or artifacts. It maybe not sound good on different devices, platforms, or environments. Additionally, it may not appeal to your target audience or market.
How can you avoid this mistake and follow a formula for recording, mixing, and mastering? Here are some tips:
- Use the HSS Formula. The HSS Formula is a set of instructions and concepts that will help you get high-quality audio with dynamic depth following industry standards. The HSS Formula stands for Home Studio Start, which is the name of the blog and podcast that created and popularized this formula. The HSS Formula consists of three main parts: recording, mixing, and mastering. Each part has its own sub-parts, such as pre-production, tracking, editing, EQ, compression, reverb, and so on. The HSS Formula provides detailed and practical information on how to perform each part and sub-part of the formula. You can find the HSS Formula on the Home Studio Start.
- Learn from the pros. Another way to follow a formula for recording, mixing, and mastering is to learn from the pros. The pros are the professional audio engineers and producers who have years of experience and expertise in the audio industry. They know the best practices, tips, and tricks to create high-quality audio with dynamic depth that meets industry standards. You can learn from the pros by reading their books, blogs, or articles, watching their videos, listening to their podcasts, or taking their courses. You can also ask them questions, get feedback, or hire them for your projects. Some of the pros that you can learn from are Graham Cochrane, Joe Gilder, Bobby Owsinski, and Rick Beato.
These are some of the ways to avoid the third mistake of not following a formula for recording, mixing, and mastering. By following these tips, you can improve the quality and depth of your audio and make it sound professional and appealing.
Conclusion
In this blog post, we have revealed the three most common and serious home recording mistakes that almost every home studio enthusiast commits while recording at home or in a specific room. We have also shown you how to avoid these mistakes by following some simple and effective tips.
We hope that by reading this post, you have learned how to improve your recordings with the HSS Formula. The HSS Formula is a set of instructions and concepts that will help you get high-quality audio with dynamic depth following industry standards.
If you want to learn more about the HSS Formula and how to apply it in your home recording projects, you can visit the Home Studio Start. You can also learn from the pros by reading our books, blogs, or articles, watching their videos, listening to their podcasts, or taking their courses.
We hope that you have enjoyed this blog post and found it useful and informative. If you have any questions, comments, or feedback, please feel free to leave them below. We would love to hear from you and help you with your home recording journey.
Thank you for using Bing and reading this blog post. Happy recording!
