Do you have a passion for music and want to record your own songs at home? Do you want to create professional-sounding podcasts or audiobooks without spending a fortune on studio equipment? Do you want to learn how to improve the audio quality in your home recording studio with some simple and effective tips?
If you answered yes to any of these questions, then this blog post is for you. In this post, I will share with you five easy tips that you can apply to your home recording studio to enhance the sound quality and avoid common problems. These tips are based on my own experience as a home recording enthusiast and the best practices from the industry experts.
Whether you are using a PC, a laptop, a tablet, or a smartphone as the center of your audio processing, these tips will help you get the most out of your recording equipment and software. You will learn how to choose and use quality cables, how to position your microphone correctly, how to deal with air conditioning noise, how to record in 24bit, and how to get a proper electrical grounding for your studio.
By following these tips, you will be able to improve the audio quality in your home recording studio and achieve the sound you want. You will also save time and money by avoiding unnecessary repairs and replacements. You will be able to record your voice or instrument with clarity, richness, and depth, and make your recordings stand out from the crowd.
So, are you ready to take your home recording studio to the next level? Then read on and discover the five easy tips to improve the audio quality in your home recording studio. Let’s get started!
Tip 1: Quality Cables
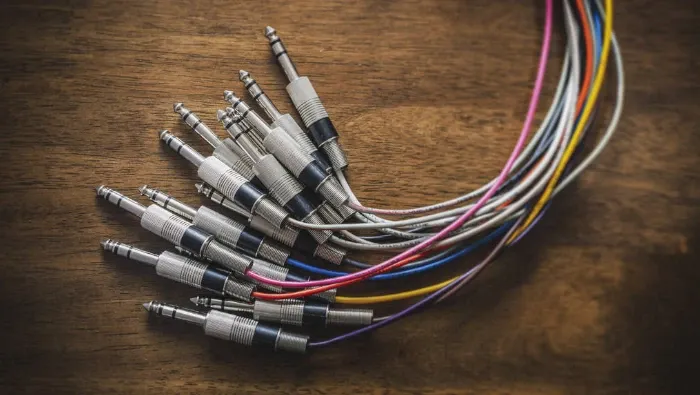
One of the most common and frustrating problems that can affect the audio quality in your home recording studio is the use of broken or low-quality cables. Cables are the connectors that transmit the audio signal from your microphone, instrument, or audio interface to your computer or speakers. If your cables are damaged, loose, or poorly shielded, they can cause noise, interference, distortion, or signal loss in your recordings.
Some of the signs that indicate that your cables are faulty are:
- You hear a crackling, buzzing, or humming sound in your recordings or playback.
- You hear a radio station or other external source in your recordings or playback.
- You hear nothing at all in your recordings or playback.
These problems are usually caused by one of the following reasons:
- Your cables are broken or have loose connections. This can happen due to wear and tear, bending, twisting, or stepping on your cables. This can create an open circuit or a short circuit in your cables, which can affect the audio signal or introduce noise or interference.
- Your cables are not properly shielded. Shielding is the layer of metal or plastic that covers the inner wires of your cables. It protects the audio signal from external electromagnetic interference, such as radio waves, power lines, or other electronic devices. If your cables are not shielded or have damaged shielding, they can pick up unwanted signals and contaminate your audio.
- Your cables are too long or too thin. The longer or thinner your cables are, the more resistance they have. This means that the audio signal will lose some of its strength and quality as it travels through the cables. This can result in lower volume, reduced frequency response, or increased noise.
To avoid these problems and improve the audio quality in your home recording studio , you need to use quality cables that are suitable for your recording needs. Here are some tips on how to choose and use quality cables:
- Choose the right type of cable for your audio source. There are different types of cables for different audio sources, such as XLR, TRS, TS, RCA, MIDI, USB, or optical. Each type of cable has its own characteristics, advantages, and disadvantages. For example, XLR cables are balanced and can carry a strong and clean audio signal over long distances, while TS cables are unbalanced and can be prone to noise and interference. You need to match the type of cable with the type of connector on your audio source and destination. For instance, if you are using a condenser microphone, you need to use an XLR cable to connect it to your audio interface or mixer.
- Pick the right length and thickness of cable for your audio source. As a general rule, you want to use the shortest and thickest cable possible for your audio source. This will minimize the resistance and maximize the signal quality. However, you also need to consider the flexibility and convenience of your cable. You don’t want to use a cable that is too short or too stiff that it limits your movement or placement of your audio source. You also don’t want to use a cable that is too long or too thin that it creates a mess or a hazard in your studio. A good compromise is to use a cable that is long enough to reach your destination comfortably, but not longer than necessary. You also want to use a cable that has a thickness of at least 22 gauge (AWG), which is the standard for most audio cables.
- Prefer the right quality and brand of cable for your audio source. Not all cables are created equal. Some cables are made of better materials and have better construction than others. You want to use cables that are made of high-quality copper, have solid connectors, have durable shielding, and have low capacitance and impedance. You also want to use cables that are from reputable and reliable brands, such as Mogami, Monster, Hosa, or Planet Waves. These brands have a reputation for producing quality cables that deliver excellent audio performance and durability. You can find these cables online or in your local music store. You may have to pay more for these cables, but they are worth the investment in the long run.
- Check, fix, and replace your cables regularly. Even if you use quality cables, they can still get damaged or worn out over time. You need to check your cables regularly for any signs of damage, such as cuts, cracks, kinks, or loose connections. You also need to fix your cables if they are broken or have minor issues, such as soldering the wires or tightening the connectors. You can do this yourself if you have some basic skills and tools, such as a soldering iron, a multimeter, and a wire stripper. You can also take your cables to a professional repair shop if you are not confident or comfortable with doing it yourself. You also need to replace your cables if they are beyond repair or have major issues, such as broken shielding, frayed wires, or corroded connectors. You don’t want to risk using faulty cables that can ruin your recordings or damage your equipment.
- Store and handle your cables properly. You also need to take good care of your cables when you are not using them. You need to store your cables in a cool, dry, and clean place, away from heat, moisture, dust, or sunlight. You also need to handle your cables gently and carefully, avoiding bending, twisting, or pulling them. You also need to coil your cables neatly and securely, using cable ties or velcro straps to keep them in place. You also need to label your cables clearly and organize them by type, length, or color. This will help you find and use your cables easily and quickly, and prevent them from getting tangled or mixed up.
By putting these tips into practice, you will be able to use quality cables that will improve the audio quality in your home recording studio. You will also be able to avoid or solve common problems that can affect your audio quality, such as noise, interference, distortion, or signal loss. You will be able to record your audio with confidence and clarity, and enjoy the results.
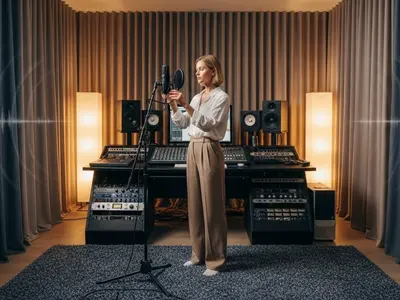
Tip 2: Microphone Positioning

Another important factor that can affect the audio quality in your home recording studio is the microphone positioning. Microphone positioning is the art and science of placing your microphone in the optimal location and angle to capture the best sound from your voice or instrument. Microphone positioning can make a huge difference in the tone, clarity, and balance of your audio, as well as the amount of room noise and feedback you get.
There are many factors that can influence the microphone positioning, such as the type of microphone , the type of sound source, the acoustics of the room, and the desired sound effect. There is no one-size-fits-all rule for microphone positioning, as different situations may require different approaches. However, there are some general principles and guidelines that you can follow to improve your microphone positioning and enhance the audio quality in your home recording studio. Here are some tips on how to position your microphone correctly:
- Choose the right type of microphone for your sound source. There are different types of microphones for different sound sources, such as dynamic, condenser, ribbon, or USB. Each type of microphone has its own characteristics, advantages, and disadvantages. For example, dynamic microphones are rugged and versatile, and can handle loud sounds and high pressure levels, while condenser microphones are sensitive and detailed, and can capture subtle nuances and high frequencies. You need to match the type of microphone with the type of sound source and the recording situation. Additionally, if you are recording vocals , you may want to use a condenser microphone to capture the full range and expression of your voice, while if you are recording drums, you may want to use a dynamic microphone to handle the high volume and impact of the drums.
- Settle for the right polar pattern for your microphone. The polar pattern is the shape of the area that the microphone picks up sound from. There are different polar patterns for different microphones, such as cardioid, omnidirectional, bidirectional, or supercardioid. Each polar pattern has its own characteristics, advantages, and disadvantages. For example, cardioid microphones pick up sound mainly from the front, and reject sound from the sides and the back, while omnidirectional microphones pick up sound equally from all directions. You need to match the polar pattern with the sound source and the recording situation. Moreover, if you are recording a solo singer, you may want to use a cardioid microphone to isolate the voice from the background noise, while if you are recording a choir, you may want to use an omnidirectional microphone to capture the sound of the whole group.
- Adopt the right distance and angle for your microphone. The distance and angle of the microphone from the sound source can affect the sound quality and the balance of the audio. As a general rule, you want to place the microphone close enough to the sound source to capture the direct sound, but not too close to cause distortion, clipping, or popping. You also want to angle the microphone slightly off-axis from the sound source to avoid unwanted reflections, feedback, or phase cancellation. However, you also need to consider the effect of the proximity and the directionality of the microphone on the sound source. For example, some microphones have a proximity effect, which means that the bass frequencies are boosted when the microphone is close to the sound source, while some microphones have a directional effect, which means that the sound quality changes depending on the angle of the microphone. You need to adjust the distance and angle of the microphone according to the sound source and the desired sound effect. For instance, if you are recording a guitar, you may want to place the microphone a few inches away from the sound hole, and angle it slightly towards the neck, to capture the balance of the low and high frequencies, while if you are recording a saxophone, you may want to place the microphone a few feet away from the bell, and angle it slightly away from the mouthpiece, to capture the natural reverb and the breathiness of the instrument.
- Determine the right number and position of microphones for your sound source. Sometimes, you may need to use more than one microphone to record a sound source, especially if the sound source is large, complex, or stereo. Using multiple microphones can help you capture the full spectrum and the spatial dimension of the sound source, as well as create a more realistic and immersive sound image. However, using multiple microphones can also create some challenges, such as phase issues, comb filtering, or masking. You need to choose the right number and position of microphones for your sound source and the recording situation. For example, if you are recording a piano, you may want to use two microphones, one for the low strings and one for the high strings, and place them in a coincident or near-coincident configuration, such as X-Y or ORTF, to capture the stereo width and the phase coherence of the piano, while if you are recording a drum kit, you may want to use several microphones, one for each drum and cymbal, and place them in a close-miking or spot-miking configuration, to capture the individual sound and the balance of the drum kit.
By embracing these techniques, you will be able to position your microphone correctly and improve the audio quality in your home recording studio. You will also be able to experiment with different microphone positions and find the best sound for your voice or instrument. You will be able to record your audio with accuracy and creativity, and enjoy your microphone.
Tip 3: Air Conditioning

Air conditioning is a blessing and a curse for your home recording studio. On one hand, air conditioning can help you keep your studio cool and comfortable, especially in hot and humid climates. Air conditioning can also protect your equipment and your recordings from overheating and moisture damage. On the other hand, air conditioning can also create a lot of noise and vibration, which can interfere with your audio quality and your recording performance. Air conditioning can also consume a lot of energy and increase your electricity bill.
So, how can you deal with air conditioning in your home recording studio? How can you enjoy the benefits of air conditioning without suffering from the drawbacks? Here are some tips on how to use air conditioning wisely and effectively in your home recording studio:
- Choose the right type and model of air conditioning for your studio. There are different types and models of air conditioning for different spaces and needs, such as window, wall, portable, split, or central. Each type and model of air conditioning has its own characteristics, advantages, and disadvantages. For example, window air conditioners are easy to install and affordable, but they are also noisy and bulky, while split air conditioners are quiet and efficient, but they are also expensive and require professional installation. You need to choose the type and model of air conditioning that suits your studio size, budget, and noise level. Additionally, if you have a small and isolated studio, you may want to use a portable or a split air conditioner, while if you have a large and shared studio, you may want to use a central or a wall air conditioner.
- Decide the right location and position of air conditioning for your studio. The location and position of your air conditioning can affect the airflow, the temperature, and the noise level in your studio. You need to choose the location and position of your air conditioning that optimizes the cooling and minimizes the noise in your studio . For example, you may want to place your air conditioning on the opposite wall or corner of your microphone or speakers, to avoid direct airflow or sound interference. You may also want to place your air conditioning at a high or a low level, depending on the type and direction of your air conditioning. Moreover, if you have a window or a wall air conditioner that blows air horizontally, you may want to place it at a high level, to avoid blowing air directly on your equipment or your head, while if you have a portable or a split air conditioner that blows air vertically, you may want to place it at a low level, to avoid blowing air directly on your floor or your feet.
- Opt for the right settings and timing of air conditioning for your studio. The settings and timing of your air conditioning can affect the temperature, the humidity, and the noise level in your studio. You need to choose the settings and timing of your air conditioning that balance the comfort and the quality in your studio. For example, you may want to set your air conditioning to a moderate temperature and fan speed, to avoid extreme changes or fluctuations in your studio environment. You may also want to turn on your air conditioning before or after your recording session, to avoid running your air conditioning during your recording session. This will help you cool down or warm up your studio without creating noise or vibration in your recordings. You may also want to use a timer or a remote control to turn on or off your air conditioning automatically or manually, depending on your recording schedule and preference.
By implementing these recommendations, you will be able to use air conditioning smartly and efficiently in your home recording studio. You will also be able to avoid or reduce the problems and challenges that air conditioning can cause in your studio. You will be able to record your audio with comfort and quality at your home.
Tip 4: Recording in 24bits

One of the technical aspects that can affect the audio quality in your home recording studio is the bit depth of your recording. Bit depth is the number of bits that are used to represent each sample of audio data. Bit depth determines the dynamic range and the resolution of your audio, which are the difference between the loudest and the quietest sounds, and the accuracy and the detail of your audio, respectively.
The most common bit depths for digital audio are 16bit and 24bit. 16bit is the standard for CDs and most consumer audio devices, while 24bit is the standard for professional audio production and distribution. The main difference between 16bit and 24bit is the amount of information and quality that they can store and reproduce. 16bit can store up to 65,536 possible values for each sample, while 24bit can store up to 16,777,216 possible values for each sample. This means that 24bit can capture and deliver more dynamics and resolution than 16bit, resulting in a richer and clearer sound.
To illustrate this difference, imagine that you are painting a picture with a limited number of colors. If you have 16 colors, you can create a decent picture, but you may not be able to capture all the shades and nuances of the scene. If you have 24 colors, you can create a more realistic and detailed picture, as you have more options and variations to choose from. The same principle applies to audio recording. If you record in 16bit, you can create a good sound, but you may not be able to capture all the subtleties and expressions of your voice or instrument. If you record in 24bit, you can create a better sound, as you have more headroom and fidelity to work with.
Therefore, if you want to improve the audio quality in your home recording studio, you may want to consider recording in 24bit. Recording in 24bit can offer you several benefits, such as:
- More dynamic range: Recording in 24bit can give you more dynamic range, which is the difference between the loudest and the quietest sounds in your audio. This means that you can record both loud and soft sounds without clipping or distorting the loud sounds, or losing or hissing the soft sounds. You can also record at a lower volume level, which can reduce the noise floor and the background noise in your studio. You can also adjust the volume level later in the editing and mixing stage, without compromising the quality or the integrity of your audio.
- More resolution: Recording in 24bit can give you more resolution, which is the accuracy and the detail of your audio. This means that you can record more nuances and expressions of your voice or instrument, such as the timbre, the tone, the texture, and the emotion. You can also record more harmonics and overtones, which can add richness and depth to your sound. You can also apply more effects and processing to your audio, without introducing artifacts or degradation to your sound.
- More flexibility: Recording in 24bit can give you more flexibility, which is the ability to manipulate and modify your audio. This means that you can edit and mix your audio more easily and effectively, as you have more data and quality to work with. You can also convert and export your audio to different formats and platforms, without losing or compromising the quality or the consistency of your sound.
However, recording in 24bit can also have some drawbacks, such as:
- More storage space: Recording in 24bit can take up more storage space, as each sample of audio data has more bits and information. This means that you will need more memory and disk space to store and manage your audio files. You will also need more bandwidth and speed to transfer and stream your audio files. You may need to upgrade your hardware and software to handle the increased data and quality of your audio files.
- More compatibility issues: Recording in 24bit can cause more compatibility issues, as not all devices and applications can support or play 24bit audio files. This means that you may need to convert or downsample your audio files to 16bit or lower, to make them compatible or accessible to other devices and applications. You may also need to adjust or optimize your audio settings and parameters, to make them suitable or optimal for different devices and applications.
Therefore, if you want to record in 24bit, you need to weigh the pros and cons, and decide if it is worth it or necessary for your recording project. You also need to set up your recording software and hardware to record in 24bit. Here are some tips on how to record in 24bit in your home recording studio:
- Choose the right recording software and hardware for 24bit recording. You need to use a recording software and hardware that can support and handle 24bit recording. You need to check the specifications and the features of your recording software and hardware, and make sure that they can record, edit, and play 24bit audio files. You also need to update or upgrade your recording software and hardware, if they are outdated or incompatible with 24bit recording. For example, you may need to use a modern and powerful computer, a high-quality and high-speed audio interface, and a professional and versatile recording software, such as Pro Tools, Logic, or Reaper, to record in 24bit.
- Set your recording software and hardware to 24bit mode. You need to configure your recording software and hardware to record in 24bit mode. You need to access the settings or the preferences of your recording software and hardware, and select or enable the 24bit option. You also need to adjust or optimize the other settings or parameters of your recording software and hardware, such as the sample rate, the buffer size, the input and output levels, and the latency, to match or complement the 24bit mode. For example, you may want to set your sample rate to 44.1 kHz or higher, your buffer size to 256 samples or lower, your input and output levels to -18 dBFS or lower, and your latency to 10 ms or lower, to record in 24bit mode.
- Record, edit, and export your audio in 24bit format. You need to record, edit, and export your audio in 24bit format. You need to use the same or compatible file format and extension for your audio files, such as WAV, AIFF, or FLAC, to preserve and maintain the 24bit quality. You also need to use the same or compatible software and hardware for your audio files, such as the same recording software and hardware, or other software and hardware that can support and handle 24bit audio files. You also need to convert or downsample your audio files to 16bit or lower, if you want to use or share them with other devices or applications that cannot support or play 24bit audio files. For example, you may want to use a converter or a dithering tool, such as Audacity, to convert or downsample your audio files to 16bit or lower, without losing or compromising the quality or the consistency of your sound.
By following these tips, you will be able to record in 24bit and improve the audio quality in your home recording studio. You will also be able to enjoy the benefits of recording in 24bit, such as more dynamic range, more resolution, and more flexibility. You will be able to record your audio with precision and quality, and enjoy the results of your hard work.
Tip 5: Electrical Grounding

The last but not least tip to improve the audio quality in your home recording studio is the electrical grounding. Electrical grounding is the process of connecting your electrical system and equipment to the earth, to provide a safe and stable path for the excess or unwanted electrical currents. Electrical grounding can protect you and your equipment from electric shocks, power surges, or lightning strikes. Electrical grounding can also prevent or reduce the electrical noise and interference in your audio, such as the 60Hz hum, the buzz, or the crackle.
Electrical noise and interference are the unwanted signals that are generated or picked up by your electrical system and equipment, due to various sources and causes, such as:
- The power grid: The power grid is the network of wires and transformers that deliver the electricity to your home and studio. The power grid can generate or transmit noise and interference, due to the fluctuations, the distortions, or the impurities in the voltage, the current, or the frequency of the electricity. For example, the power grid can produce the 60Hz hum, which is the low-pitched and constant noise that matches the frequency of the alternating current (AC) in North America.
- The ground loop: The ground loop is the circular path of the electrical current that flows between two or more devices that are connected to the same or different ground points. The ground loop can create noise and interference, due to the differences or the imbalances in the voltage, the resistance, or the impedance of the devices or the ground points. For example, the ground loop can cause the buzz, which is the high-pitched and variable noise that changes with the volume or the tone of the audio.
- The electromagnetic interference (EMI): The electromagnetic interference is the disturbance or the interference that is caused by the electromagnetic fields or waves that are emitted or received by the electrical or electronic devices. The electromagnetic interference can affect the audio signal, due to the induction, the coupling, or the radiation of the electromagnetic fields or waves. For example, the electromagnetic interference can produce the crackle, which is the irregular and random noise that occurs when the audio signal is corrupted or distorted by the electromagnetic fields or waves.
To avoid or minimize these problems and improve the audio quality in your home recording studio, you need to have a proper electrical grounding for your studio. Electrical grounding can offer you several benefits, such as:
- Safety: Electrical grounding can provide a safe and stable path for the excess or unwanted electrical currents, which can otherwise cause electric shocks, power surges, or lightning strikes. Electrical grounding can divert the excess or unwanted electrical currents to the earth, which can absorb and dissipate them safely and effectively. Electrical grounding can also equalize the voltage and the potential of your electrical system and equipment, which can prevent or reduce the sparks or the arcs that can ignite or damage your equipment or your studio.
- Noise reduction: Electrical grounding can prevent or reduce the electrical noise and interference in your audio, which can otherwise degrade or ruin your audio quality and your recording performance. Electrical grounding can eliminate or isolate the sources and the causes of the electrical noise and interference, such as the power grid, the ground loop, or the electromagnetic interference. Electrical grounding can also shield or filter the audio signal from the electrical noise and interference, which can improve the signal-to-noise ratio and the clarity of your audio.
However, having a proper electrical grounding for your studio can also have some challenges, such as:
- Complexity: Electrical grounding can be complex and difficult, as it involves various components and factors, such as the ground rod, the ground wire, the ground bus, the ground fault circuit interrupter (GFCI), the outlet, the plug, the cable, the device, the polarity, the phase, the impedance, and the resistance. You need to understand and follow the principles and the standards of electrical grounding, such as the National Electrical Code (NEC) or the International Electrotechnical Commission (IEC), to ensure the safety and the quality of your electrical grounding. You also need to use the appropriate and compatible tools and materials for your electrical grounding, such as the copper or the steel rod, the green or the bare wire, the three-prong or the two-prong plug, and the balanced or the unbalanced cable.
- Cost: Electrical grounding can be costly and time-consuming, as it requires professional installation and maintenance. You need to hire a qualified and licensed electrician to install and maintain your electrical grounding, to ensure the safety and the quality of your electrical grounding. You also need to pay for the labor and the materials for your electrical grounding, which can vary depending on the size and the complexity of your studio and your electrical system. You also need to check and test your electrical grounding regularly, to ensure the functionality and the reliability of your electrical grounding.
Therefore, if you want to have a proper electrical grounding for your studio, you need to weigh the pros and cons, and decide if it is worth it or necessary for your studio. You also need to get a professional electrician to install and maintain your electrical grounding. Here are some tips on how to get a proper electrical grounding for your studio:
- Choose the right location and type of ground rod for your studio. The ground rod is the metal rod that is driven into the earth, to provide a physical and electrical connection to the earth. You need to choose the right location and type of ground rod for your studio, to ensure the effectiveness and the efficiency of your electrical grounding. For example, you may want to place your ground rod outside your studio, away from any water pipes, gas lines, or other electrical wires, to avoid any interference or damage. You may also want to use a copper or a steel rod, with a length of at least 8 feet and a diameter of at least 0.5 inch, to ensure the conductivity and the durability of your ground rod.
- Pick the right size and color of ground wire for your studio. The ground wire is the wire that connects the ground rod to the ground bus, the outlet, and the device, to provide a continuous and uninterrupted path for the electrical current. You need to choose the right size and color of ground wire for your studio, to ensure the safety and the quality of your electrical grounding. For example, you may want to use a green or a bare wire, with a gauge of at least 10 AWG, to indicate and protect the ground wire. You may also want to use a solid or a stranded wire, depending on the flexibility and the durability of the wire.
- Select the right type and model of ground bus for your studio. The ground bus is the metal bar or strip that connects the ground wires from the outlets and the devices to the ground wire from the ground rod, to provide a common and centralized point for the electrical grounding. You need to choose the right type and model of ground bus for your studio, to ensure the functionality and the reliability of your electrical grounding. For example, you may want to use a copper or a brass bus, with a length and a width of at least 6 inches and 0.25 inch, respectively, to ensure the capacity and the stability of the ground bus. You may also want to use a bus with enough holes or terminals to accommodate all the ground wires from your studio, to ensure the connectivity and the organization of the ground bus.
- Choose the right type and model of outlet and plug for your studio. The outlet and the plug are the devices that connect the cable and the device to the electrical system and the electrical grounding, to provide the power and the protection for the cable and the device. You need to choose the right type and model of outlet and plug for your studio, to ensure the compatibility and the quality of your electrical grounding. For example, you may want to use a three-prong or a two-prong outlet and plug, depending on the type and the polarity of your cable and device. You may also want to use a GFCI outlet and plug, which can detect and interrupt the ground fault or the leakage current, to prevent or reduce the electric shock or the fire hazard.
- Prefer the right type and model of cable and device for your studio. The cable and the device are the components that transmit and process the audio signal and the electrical current, to produce and record the sound. You need to choose the right type and model of cable and device for your studio, to ensure the performance and the quality of your audio and your electrical grounding. For example, you may want to use a balanced or an unbalanced cable and device, depending on the type and the level of your audio signal and your electrical noise. You may also want to use a shielded or an unshielded cable and device, depending on the type and the amount of your electromagnetic interference.
By applying these strategies, you will be able to get a proper electrical grounding for your studio and improve the audio quality in your home recording studio. You will also be able to avoid or solve the problems and challenges that electrical grounding can cause in your studio, such as electric shocks, power surges, lightning strikes, noise, interference, distortion, or signal loss. You will be able to record your audio with safety and quality.
Conclusion
In this blog post, I have shared with you five easy tips to improve the audio quality in your home recording studio. These tips are:
- Tip 1: Quality Cables: Use quality cables that are suitable for your audio source and destination, and check, fix, and replace them regularly.
- Tip 2: Microphone Positioning: Use the right type, polar pattern, distance, angle, and number of microphones for your sound source and recording situation.
- Tip 3: Air Conditioning: Use the right type, model, location, position, settings, and timing of air conditioning for your studio size, budget, and noise level.
- Tip 4: Recording in 24bit: Use the right recording software and hardware, settings and parameters, file format and extension, and converter and dithering tool for 24bit recording.
- Tip 5: Electrical Grounding: Use the right type, model, size, color, and location of ground rod, wire, bus, outlet, plug, cable, and device for electrical grounding.
By applying these tips, you will be able to enhance the sound quality and avoid common problems in your home recording studio. You will be able to record your voice or instrument with clarity, richness, and depth, and make your recordings stand out from the crowd.
I hope you have found this blog post helpful and informative. If you have any questions or feedback, please feel free to leave a comment below. I would love to hear from you and learn from your experience.
Thank you for reading this blog post and happy recording!
Rodrigo Marques
Rodrigo Marques, founder of Home Studio Start, is a music production veteran with over 25 years of experience. Since 1997, he has mastered tools like Sound Forge, Samplitude Pro, and VST plugins, producing albums for emerging artists globally. Creator of the innovative Formula HSS for mixing and mastering, Rodrigo has empowered thousands through online courses and his ebook, Home Studio Start. Dedicated to democratizing music production, he equips aspiring artists with skills for professional-grade music and sustainable careers.
About the author