Are you a musician or a producer who wants to create your own music at home? Do you want to learn how to mix your tracks like a pro and achieve a professional sound quality? If you answered yes to any of these questions, then this blog post is for you.
In this blog post, I will share with you some tips and tricks on how to master the art of home recording. You will learn how to define your mixing goals, how to choose the right audio equipment for your budget, how to create the optimal mixing environment, how to use effects wisely and creatively, and how to break the rules and experiment with your mix.
By the end of this blog post, you will have a better understanding of the home recording process and how to apply it to your own projects. You will also be able to produce music that sounds great and reflects your own style and personality.
So, are you ready to start your home recording journey? Then let’s dive in!
Mistake #1: Not Having a Clear Vision of Your Mix

One of the most important steps in the home recording process is to define your mixing goals. What do you want to achieve with your mix? How do you want your music to sound like? What are the elements that you want to emphasize or de-emphasize in your mix?
Having a clear vision of your mixing goals will help you make better decisions and avoid wasting time and energy on unnecessary or counterproductive actions. It will also help you evaluate your progress and results more objectively and accurately.
But how do you define your mixing goals? Here are some tips and examples to help you:
- Listen to reference tracks: Reference tracks are songs that have a similar genre, style, mood, or sound quality as the one you want to create. They can serve as a guide and a benchmark for your own mix. You can use reference tracks to compare and contrast different aspects of your mix, such as the balance, the frequency spectrum, the dynamics, the stereo image, the effects, and the overall loudness. You can also use reference tracks to identify and emulate the techniques and tricks that the professional producers and engineers used to achieve their desired sound. You can find reference tracks on streaming platforms, online databases, or your own music collection. Some examples of reference tracks for home recording are Home Recording by David Gray , Home by Edward Sharpe and the Magnetic Zeros, and Home by Daughtry.
- Analyze the production process: Another way to define your mixing goals is to analyze the production process of your reference tracks or your own tracks. You can use tools such as spectrum analyzers, level meters, phase meters, or waveform editors to visualize and measure different aspects of your mix. You can also use tools such as EQ, compression, reverb, or delay to manipulate and enhance your mix. By analyzing the production process, you can learn how to shape and polish your mix and how to achieve a consistent and coherent sound. You can also learn how to avoid common mistakes and pitfalls that can ruin your mix, such as clipping, distortion, noise, phase cancellation, or masking. You can find tools for analyzing and processing your mix on software applications, plugins, or online platforms. Some examples of tools for home recording are Audacity , Reaper , and Soundtrap .
By following these tips and examples, you can define your mixing goals more easily and effectively. Remember that your mixing goals are not fixed or rigid, but rather flexible and adaptable. You can always adjust and refine your mixing goals as you go along and as you discover new possibilities and challenges. The key is to have a clear direction and a purpose for your mix and to use your ears and your creativity as your main tools.
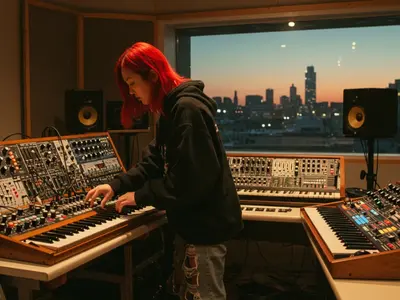
Mistake #2: Using the Wrong or Low-Quality Audio Equipment
One of the most common myths in the home recording industry is that you need expensive equipment to produce quality music. This is not true. You can achieve great results with affordable and accessible equipment, as long as you know how to use it properly and effectively.
Of course, having high-end equipment can make your life easier and your sound better, but it is not a guarantee of success. In fact, having too much or too complex equipment can be counterproductive and overwhelming, especially if you are a beginner or have a limited budget.
So, how do you choose the right audio equipment for your budget? Here are some suggestions and recommendations to help you:
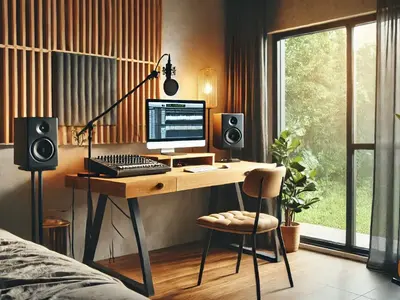
- Start with the essentials: The essential audio equipment for home recording are a computer, an audio interface, a microphone, a pair of headphones, and a pair of studio monitors . These are the basic components that you need to capture, process, and playback your audio. You can find these equipment in different price ranges and quality levels, depending on your needs and preferences. Some examples of essential audio equipment for home recording are Focusrite Scarlett Solo Studio, Blue Yeti USB Microphone, and KRK Rokit 5 G4 Studio Monitor.
- Upgrade gradually: Once you have the essential audio equipment, you can upgrade gradually and selectively, according to your goals and priorities. You can add more equipment to expand your capabilities and improve your sound quality, such as MIDI controllers, synthesizers, drum machines, effects pedals, preamps, compressors, equalizers, and so on. You can also replace your existing equipment with better ones, if you feel that they are limiting or compromising your sound. However, you should always consider the cost-benefit ratio and the compatibility of your equipment, and avoid buying unnecessary or redundant equipment. Some examples of upgradeable audio equipment for home recording are Akai MPK Mini MK3, Korg Minilogue XD, and Boss GT-1000.
- Use virtual alternatives: Another way to choose the right audio equipment for your budget is to use virtual alternatives. Virtual alternatives are software applications, plugins, or online platforms that simulate or emulate the functions and features of hardware equipment. They can offer you more flexibility, variety, and convenience, as well as save you money and space. You can use virtual alternatives to create, edit, mix, and master your audio, as well as to add effects, instruments, and sounds to your mix. You can also use virtual alternatives to access and control your hardware equipment remotely. Some examples of virtual alternatives for home recording are Reaper, Soundtrap, and Virtual Mixing Console.
By following these suggestions and recommendations, you can choose the right audio equipment for your budget and achieve professional results. Remember that the most important factor in home recording is not the equipment, but the skills and the creativity of the user. You can make great music with any equipment, as long as you know how to use it well and have fun with it.
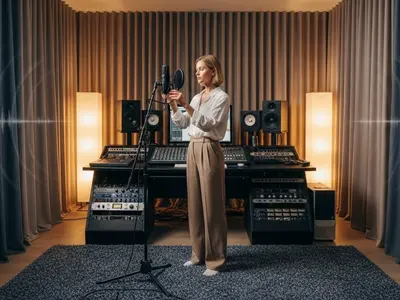
Mistake #3: Ignoring or Neglecting the Mixing Environment
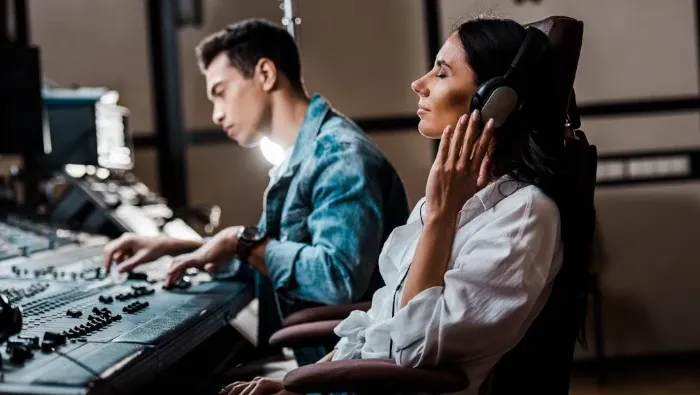
One of the biggest secrets of commercial studios is how they create the optimal mixing environment. The mixing environment is the physical and acoustic space where you record, mix, and listen to your audio. The mixing environment can have a significant impact on the quality and accuracy of your sound, as well as on your comfort and productivity.
Creating the optimal mixing environment can be challenging, especially if you are working in a home studio . You may have to deal with issues such as noise, reflections, reverberation, interference, or distortion. However, you can overcome these issues and improve your mixing environment by following some guidelines and best practices. Here are some of them:
- Optimize your signal density: Signal density is the amount of information and detail that your audio has. The higher the signal density, the better the sound quality and the more “punch” and “presence” your audio will have. You can optimize your signal density by using high-quality audio sources, such as samples, instruments, or microphones, and by recording and processing your audio at high bit rates and sample rates. You can also optimize your signal density by avoiding clipping, distortion, noise, or any other unwanted sounds that can reduce the clarity and fidelity of your audio. You can use tools such as level meters, spectrum analyzers, or noise reduction plugins to monitor and control your signal density. Some examples of tools for optimizing your signal density are Audacity, Reaper, and iZotope RX.
- Improve your room acoustics: Room acoustics is the way that sound behaves and interacts with the surfaces and objects in your room. Room acoustics can affect the frequency response, the dynamics, the stereo image, and the overall balance of your sound. You can improve your room acoustics by treating your room with acoustic materials, such as foam, panels, bass traps, or diffusers, that can absorb, reflect, or diffuse the sound waves in your room. You can also improve your room acoustics by arranging your furniture and equipment in a way that minimizes the reflections, reverberation, or interference of the sound in your room. You can use tools such as room measurement software, acoustic calculators, or online guides to measure and improve your room acoustics. Some examples of tools for improving your room acoustics are Room EQ Wizard, Acoustic Fields Calculator, and Sound on Sound Guide.
- Position your monitors correctly: Monitors are the speakers that you use to listen to your audio. Monitors can provide you with a more accurate and realistic representation of your sound than headphones or consumer speakers. However, monitors can also be affected by the mixing environment and the way that you position them in your room. You can position your monitors correctly by following some rules and tips, such as placing them at ear level, forming an equilateral triangle with your listening position, angling them towards your ears, and leaving some space between them and the walls. You can also position your monitors correctly by using tools such as monitor stands, isolation pads, or calibration software to adjust and optimize the height, angle, distance, and alignment of your monitors. Some examples of tools for positioning your monitors correctly are Ultimate Support Monitor Stands, Auralex MoPADs, and Sonarworks Reference 4.
By following these guidelines and best practices, you can create the optimal mixing environment for your home studio and achieve a great sound. Remember that the mixing environment is not a fixed or static thing, but rather a dynamic and adaptable one. You can always experiment and modify your mixing environment as you learn and discover new things. The key is to have a good listening environment and a good listening experience.
Mistake #4: Overusing or Misusing Effects

One of the most fun and creative aspects of home recording is using effects. Effects are the processes and devices that modify or enhance the sound of your audio. Effects can add color, depth, dimension, and character to your sound, as well as correct or improve some issues or flaws in your audio.
However, effects can also be tricky and risky to use. If you use too much or too little effects, or if you use the wrong effects, you can ruin your sound and make it sound unnatural, artificial, or unpleasant. Therefore, you need to use effects wisely and creatively, and know how to balance and blend them with your audio.
But how do you use effects wisely and creatively? Here are some dos and don’ts to help you:
- Do use effects for a purpose: Before you apply any effect to your audio, you should ask yourself: What is the purpose of this effect? What do I want to achieve with this effect? How does this effect serve my mixing goals and my musical vision? You should use effects for a specific and clear purpose, such as enhancing the tone, the dynamics, the space, or the mood of your sound, or fixing some problems or errors in your audio , such as noise, distortion, or clipping. You should avoid using effects for no reason, or just because they sound cool or fancy. You should also avoid using effects that contradict or conflict with your purpose, or that create new problems or errors in your audio. Some examples of effects that have a clear purpose are EQ, compression, reverb, and delay.
- Don’t use effects excessively: One of the most common mistakes in home recording is using effects excessively. Using too much effects can make your sound too loud, too bright, too muddy, too harsh, too thin, or too cluttered. It can also make your sound lose its naturalness, its clarity, its definition, or its identity. You should use effects moderately and subtly, and only to the extent that they enhance and improve your sound, not overpower or overwhelm it. You should also use effects selectively and sparingly, and only on the tracks or parts that need them, not on everything. You should also use effects in a balanced and harmonious way, and make sure that they complement and support each other, not compete or clash with each other. Some examples of effects that can be used excessively are distortion, chorus, flanger, and phaser.
- Do use effects creatively: One of the most exciting and rewarding aspects of home recording is using effects creatively. Using effects creatively can make your sound more original, more expressive, more interesting, or more surprising. It can also make your sound more personal, more unique, or more distinctive. You can use effects creatively by experimenting and exploring different effects and combinations of effects, and by discovering new sounds and possibilities. You can also use effects creatively by breaking the rules and conventions of effects, and by creating your own effects and sounds. You can also use effects creatively by using your ears and your intuition as your main guides, and by following your own taste and style. Some examples of effects that can be used creatively are reverse, pitch shift, granular, and glitch.
By following these dos and don’ts, you can use effects wisely and creatively for your home recording and achieve a great sound. Remember that effects are not the end, but the means to an end. Effects are not the main thing, but the icing on the cake. Effects are not the magic bullet, but the spice of life. You can use effects to enhance and improve your sound, but you cannot use effects to replace or compensate for your sound. The most important thing in home recording is your sound, and the effects are there to serve and support your sound.
Mistake #5: Following the Rules Blindly or Dogmatically

One of the most liberating and enjoyable aspects of home recording is breaking the rules and experimenting with your mix. Breaking the rules and experimenting with your mix can make your sound more adventurous, more innovative, more diverse, or more fun. It can also make your sound more expressive, more personal, or more authentic.
However, breaking the rules and experimenting with your mix can also be challenging and risky. If you break the rules and experiment with your mix without a plan or a purpose, you can end up with a sound that is chaotic, confusing, inconsistent, or unappealing. Therefore, you need to break the rules and experiment with your mix with a sense of direction and a sense of balance.
But how do you break the rules and experiment with your mix? Here are some tips and examples to help you:
- Learn the rules before you break them: Before you break the rules and experiment with your mix, you should learn the rules and understand the principles of home recording. You should learn the basics and the fundamentals of audio production, such as the frequency spectrum, the dynamics, the stereo image, the effects, and the loudness. You should also learn the standards and the conventions of your genre, style, or audience, such as the structure, the instrumentation, the tempo, the mood, and the sound quality. By learning the rules, you can gain the knowledge and the skills that you need to break the rules and experiment with your mix effectively and intelligently. You can also gain the confidence and the credibility that you need to break the rules and experiment with your mix boldly and convincingly. You can learn the rules by reading books, articles, or blogs, by watching videos, podcasts, or webinars, or by taking courses, workshops, or tutorials. Some examples of resources for learning the rules are Mixing Secrets for the Small Studio, The Recording Revolution, and Coursera Audio Engineering Course.
- Break the rules for a reason: When you break the rules and experiment with your mix, you should have a reason and a goal for doing so. You should break the rules and experiment with your mix to achieve a specific and desired effect, such as creating contrast, tension, surprise, or novelty. You should also break the rules and experiment with your mix to express your own voice , vision, or message, and to communicate something that is meaningful, relevant, or valuable to you and your listeners. You should avoid breaking the rules and experimenting with your mix for no reason, or just because you can or you want to. You should also avoid breaking the rules and experimenting with your mix that goes against your reason or your goal, or that alienates or offends your listeners. Some examples of reasons for breaking the rules and experimenting with your mix are Radiohead’s OK Computer, Björk’s Biophilia, and Billie Eilish’s When We All Fall Asleep, Where Do We Go?.
- Experiment with your mix in a controlled and balanced way: When you break the rules and experiment with your mix, you should do it in a controlled and balanced way. You should experiment with your mix in a way that is intentional, deliberate, and strategic, and not random, accidental, or careless. You should also experiment with your mix in a way that is moderate, subtle, and tasteful, and not extreme, excessive, or vulgar. You should also experiment with your mix in a way that is harmonious, coherent, and consistent, and not discordant, contradictory, or erratic. You should also experiment with your mix in a way that is original, creative, and unique, and not clichéd, derivative, or generic. You can experiment with your mix in a controlled and balanced way by using tools such as automation, modulation, or morphing, that can help you change and manipulate your mix in different ways. You can also experiment with your mix in a controlled and balanced way by using tools such as A/B testing, blind testing, or feedback, that can help you evaluate and improve your mix in different ways. Some examples of tools for experimenting with your mix in a controlled and balanced way are Reaper, Soundtoys, and LANDR.
By following these tips and examples, you can break the rules and experiment with your mix for your home recording and achieve a great sound. Remember that breaking the rules and experimenting with your mix is not a license to do whatever you want, but a privilege to do what you love. Breaking the rules and experimenting with your mix is not a way to escape from reality, but a way to explore your potential. Breaking the rules and experimenting with your mix is not a sign of weakness, but a mark of strength. You can break the rules and experiment with your mix to challenge yourself and to express yourself, and to create something that is truly yours.
Conclusion
In this blog post, I have shared with you some tips and tricks on how to master the art of home recording. You have learned how to define your mixing goals, how to choose the right audio equipment for your budget, how to create the optimal mixing environment, how to use effects wisely and creatively, and how to break the rules and experiment with your mix.
By applying these tips and tricks, you can improve your home recording skills and achieve a professional sound quality. You can also produce music that sounds great and reflects your own style and personality.
Now, it’s your turn to put these tips and tricks into practice and start your own home recording projects. I hope you have enjoyed this blog post and found it useful and informative. If you have any questions or feedback, please feel free to leave a comment below. I would love to hear from you and see your results.
Thank you for reading and happy home recording!
Rodrigo Marques
Rodrigo Marques, founder of Home Studio Start, is a music production veteran with over 25 years of experience. Since 1997, he has mastered tools like Sound Forge, Samplitude Pro, and VST plugins, producing albums for emerging artists globally. Creator of the innovative Formula HSS for mixing and mastering, Rodrigo has empowered thousands through online courses and his ebook, Home Studio Start. Dedicated to democratizing music production, he equips aspiring artists with skills for professional-grade music and sustainable careers.
About the author