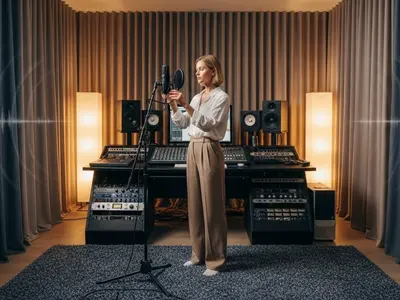
Let's start with a common scenario: You've just stepped into the world of audio production, buzzing with excitement, ready to create your masterpiece. Instantly, you're bombarded with the notion that top-tier equipment is the golden ticket to pristine audio recording quality. It's a pervasive myth that has led many to believe the path to excellence is paved with expensive gear. But is that really the case?
The truth is, while quality equipment plays a role, it's not the be-all and end-all of audio production. Think of it this way: owning a high-end paintbrush doesn't automatically make you Picasso. Similarly, a state-of-the-art studio microphone won't guarantee a hit record. It's about how you use your tools, not just what tools you have at your disposal.
In this journey towards demystifying audio recording quality, we invite you to look beyond the price tags and shiny exteriors. Understanding the nuances of your equipment, mastering the craft of mixing and mastering, and honing your skills can make a world of difference. The goal here is to challenge your perceptions and guide you towards realizing that true quality stems from knowledge, practice, and creativity.
So, before you consider investing your life savings in high-end gear, let's explore how you can achieve outstanding audio recording quality in your home studio with the right approach and a deeper understanding of the production process. Get ready to uncover the real secrets behind capturing that perfect sound, proving once and for all that the myth of equipment equaling quality is just that—a myth.
Understanding the Basics of Audio Production
Diving into the realm of audio production can feel like venturing into uncharted waters, with a vast sea of technical jargon and equipment specs awaiting. Yet, the cornerstone of producing high-quality audio isn't found in the complexity of the gear but in the grasp of the basics. Knowing the fundamentals of audio production is akin to having a map in this expansive ocean, guiding you to make informed decisions and utilize whatever equipment you have to its fullest potential.The journey starts with familiarizing yourself with the three pivotal stages of audio production: recording, mixing, and mastering. Each phase plays a unique role in shaping the final sound. Recording is the initial step, capturing the raw performance. Here, the focus is on achieving the cleanest, most natural sound possible. It's where the nuances of microphone placement, room acoustics, and performance techniques come into play, proving that skill and knowledge trump high-end gear.
Putting it All Together
Next up is mixing, the art of blending and balancing the various tracks into a cohesive whole. This stage is where your creativity and technical acumen shine, adjusting levels, applying effects, and tweaking frequencies to bring out the best in your recording. It's a meticulous process that requires a keen ear and a deep understanding of sound dynamics, demonstrating again that the wizardry lies not in the wand but in the wizard.
Mastering, the final polish, ensures your track sounds consistent and impactful across all playback systems. It involves fine-tuning the mix's overall sound, correcting any imbalances, and enhancing clarity and punch. Mastery over mastering is about precision and subtlety, attributes that are honed over time through practice and study, not purchased off a shelf.
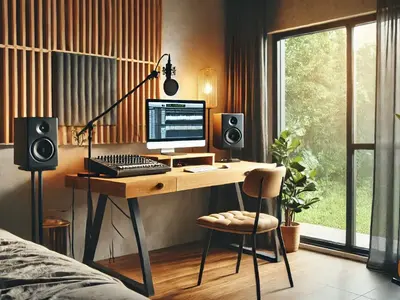
In essence, understanding the basics of audio production empowers you to make the most of your home studio , regardless of its size or the price tags of your equipment. It's about leveraging your knowledge to breathe life into your recordings, proving that in the world of audio production, knowledge is not just power—it's quality. So, embark on this educational journey with an open mind, ready to absorb the principles that will elevate your audio recording quality, piece by piece, note by note.
Selecting the Right Equipment for Your Home Studio
Choosing the right equipment for your home studio is a crucial step that intertwines with your journey through the fundamentals of audio production. It's not about stocking up on the most expensive or advanced gear; rather, it's about selecting tools that resonate with your unique needs, goals, and the nuances of your creative space. Here's how to navigate the vast marketplace of audio equipment with wisdom and foresight, ensuring you invest in gear that truly enhances your recording quality.
1. Assess Your Needs
Begin by evaluating what you aim to achieve with your recordings. Are you a solo vocalist, a podcaster, or an electronic music producer? Each path demands specific tools tailored to capture the essence of your work. For instance, a quality condenser microphone might be paramount for a vocalist, while a versatile audio interface could be a producer's best ally.
2. Understand Your Space
The acoustics of your recording environment play a significant role in your equipment choices. A smaller, untreated room may require microphones with a tighter pickup pattern to minimize unwanted reflections, unlike a well-treated studio space. Investing in basic acoustic treatment can sometimes offer a more noticeable improvement in recording quality than upgrading a microphone.
3. Set a Realistic Budget
It's easy to fall into the trap of overspending on gear you might not need. Set a budget that reflects your current level and future goals. Remember, a well-chosen selection of entry to mid-level equipment can produce astonishing results in skilled hands. Allocate funds wisely, focusing on items that offer the most significant impact on your sound quality.
4. Seek Versatility and Durability
Look for equipment that offers flexibility and longevity. A microphone that excels across various recording scenarios or an audio interface with ample connectivity can serve your evolving needs as you grow. Durability ensures that your investments withstand the test of time and the rigors of creative experimentation.
5. Do Your Research
Dive into reviews, tutorials, and user forums. The experiences of others can provide invaluable insights into the performance and reliability of equipment. However, remember to filter this information through your unique context and needs.
6. Trust Your Ears
Ultimately, the proof is in the pudding. Whenever possible, test gear in a real-world setting or rely on high-quality audio samples to gauge how well it matches your expectations. Your ears are your most valuable asset in determining what enhances your sound.Selecting the right equipment for your home studio is a journey of balance—between needs and wants, budget and dreams. By making informed, thoughtful choices, you're not just buying gear; you're investing in the future of your audio production quality. Equip your studio smartly, and let every piece of gear you choose be a stepping stone towards achieving your vision of sonic excellence.
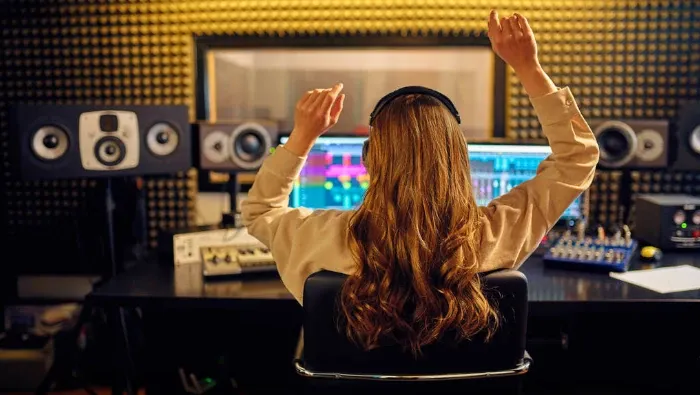
The Significance of Mixing in Audio Quality

Mixing is the alchemy of audio production, a crucial phase where raw recordings are transformed into a harmonious, compelling piece. It's an art form that requires both technical skill and creative intuition, playing a pivotal role in determining the overall quality of your audio. Understanding the significance of mixing and honing your skills in this area can elevate your recordings from amateur to professional, regardless of the equipment you use.
1. Balancing Acts
The primary goal of mixing is to achieve a balance among all the elements in your track. This means adjusting levels to ensure that no single instrument or vocal overshadows the others unless intentionally desired. It's about creating space for each component to shine, contributing to the track's emotional and dynamic impact.
2. Sculpting Frequencies
Every sound occupies a specific frequency range. Mixing involves sculpting these frequencies to prevent clashing and to ensure clarity. Techniques like EQ (equalization) allow you to enhance or diminish specific frequencies, helping each element of your mix to stand out without competing with one another.
3. Dynamic Range Control
Dynamics play a crucial role in conveying emotion and keeping the listener engaged. Through the use of compression and gating, you can control the dynamic range, ensuring that quieter passages are audible and that louder sections maintain their impact without distorting.
4. Adding Depth and Dimension
Reverb and delay are powerful tools in a mixer's arsenal, adding depth and dimension to a track. They can simulate different acoustic environments, from intimate rooms to vast halls, adding a sense of space that makes the mix breathe and resonate with the listener.
5. Creative Effects
Beyond technical corrections, mixing is an opportunity to add creative effects that enhance the track's mood and style. Whether it's the subtle use of modulation effects like chorus and flanger or the strategic placement of automation to bring life to transitions, the creative aspects of mixing are where your unique sound signature is forged.
6. The Final Polish
A well-mixed track sounds complete and polished, ready to stand alongside professional releases. It ensures consistency across various listening environments, from headphones to large sound systems, making your music accessible and enjoyable for a wide audience.Mastering the craft of mixing is a lifelong journey, one that requires patience, practice, and continuous learning. But the rewards are immense. By elevating the quality of your mixes, you not only enhance the listener's experience but also assert your identity as an artist and producer. In the pursuit of audio recording quality, mixing is not just a step—it's a significant leap towards realizing your creative vision.
Mastering: The Final Touch
Mastering is often seen as the final frontier in the journey of an audio production, where the carefully mixed tracks undergo a transformative polish, emerging as a cohesive, ready-to-distribute masterpiece. This critical phase in the production process adds the finishing touches, ensuring your work not only stands up to professional scrutiny but also resonates deeply with your audience, irrespective of the medium through which it is played.
1. Consistency Across Platforms
Mastering ensures your music sounds consistent and impactful whether it's streamed online, played on the radio, or enjoyed through headphones. This uniformity is crucial in today's varied listening environments, ensuring your audio retains its character and intensity everywhere.
2. Volume Leveling
One of the key aspects of mastering is adjusting the overall loudness, making sure your track competes favorably with other professional recordings without sacrificing dynamic range. The Loudness Wars of the past have taught us the value of maintaining dynamic integrity for a more natural and engaging listening experience.
3. Frequency Balancing
Even after a detailed mix, some tracks might still have slight imbalances in their frequency spectrum . Mastering provides an opportunity to make these final adjustments, ensuring a smooth and even frequency response across the entire track. This careful tweaking prevents any frequency from dominating unnecessarily, contributing to a clearer, more balanced sound.
4. Sequencing and Spacing
In the context of an album or EP, mastering also involves sequencing the tracks in the desired order and determining the optimal space between them. These decisions affect the flow and pacing of the listening experience, enhancing the narrative or thematic connections between songs.
5. Quality Control
Beyond enhancing sonic qualities, mastering is a final check for any technical issues that might have been missed during mixing . Clicks, pops, unwanted noise, or other anomalies are addressed, ensuring the highest possible quality before distribution.
6. Preparing for Distribution
Finally, mastering adapts your music for its final formats, whether digital, CD, vinyl, or streaming platforms, each with its own specifications and requirements. This step is crucial for preserving the integrity and quality of your audio across all formats.Mastering is more than just a technical necessity; it's an art that requires a discerning ear, technical prowess, and an understanding of the music's emotional core. By applying this final touch, you're not just finishing a track; you're preparing it to make its mark in the world, ensuring it's received in the best possible light by your audience. The journey from conception to completion is a long one, but mastering is the crucial step that readies your music for the world stage, promising an immersive and enriching experience for listeners everywhere.
Practical Tips and Tricks to Improve Recording Quality
Achieving superior audio recording quality in your home studio doesn't always require breaking the bank on high-end equipment. Instead, refining your technique and making a few smart adjustments can lead to significant improvements. Here are some practical tips and tricks to elevate the quality of your recordings, ensuring that every track you produce resonates with clarity, depth, and professionalism.
1. Optimize Your Recording Environment
Begin with your recording space. Simple adjustments like hanging blankets or installing foam panels can drastically reduce unwanted echo and reverb. The goal is to create a controlled environment that captures sound cleanly, without interference from external noises or room acoustics.
2. Position Your Microphone Wisely
Microphone placement is paramount. Experiment with different positions relative to the sound source to find the sweet spot where your recordings sound the most natural and balanced. Remember, even a few inches can make a world of difference in audio quality.
3. Use a Pop Filter
A pop filter is a small, affordable accessory that can significantly improve vocal recordings by filtering out plosive sounds ("p," "b," and "t" sounds) that can cause distortion. It's an easy addition that can lead to a clearer, more professional vocal track.
4. Leverage DI Boxes for Instruments
For recording electric guitars or bass, consider using a DI (direct injection) box. It allows you to connect your instrument directly to your audio interface, providing a cleaner, more direct signal path and often resulting in a cleaner sound.
5. Monitor Levels Carefully
Keep an eye on your input levels to avoid clipping, which occurs when the signal is too strong and distorts. Aim for a healthy signal level that's loud enough to capture the nuances of your performance but not so loud that it risks clipping.
6. Record at a High Bit Rate and Sample Rate
Ensure you're recording at a high bit rate and sample rate to capture the best quality sound. A 24-bit rate and a sample rate of 44.1kHz or higher are standard for professional-quality recordings.
7. Invest Time in Learning Your Tools
The more you know about your recording software (DAW) and equipment, the better you can use them to your advantage. Spend time learning the ins and outs of your tools, and don't hesitate to experiment with different settings and features.
8. Practice Good Cable Management
It might seem trivial, but organizing your cables and ensuring they're in good condition can prevent a lot of potential audio interference and noise issues.
9. Keep Your Equipment Clean
Regularly cleaning your microphones, interfaces, and other equipment can prevent dust buildup, which can affect sound quality over time.
By implementing these practical tips, you can significantly enhance the quality of your recordings without the need for expensive upgrades. It's about making the most of what you have, understanding the principles of sound, and applying a touch of creativity and patience to your recording process. With each step, you'll find your tracks sounding better, encouraging you to continue exploring the depths of audio production.
Rodrigo Marques
Rodrigo Marques, founder of Home Studio Start, is a music production veteran with over 25 years of experience. Since 1997, he has mastered tools like Sound Forge, Samplitude Pro, and VST plugins, producing albums for emerging artists globally. Creator of the innovative Formula HSS for mixing and mastering, Rodrigo has empowered thousands through online courses and his ebook, Home Studio Start. Dedicated to democratizing music production, he equips aspiring artists with skills for professional-grade music and sustainable careers.
About the author