Hey there, audio enthusiasts and laptop warriors! Are you ready to dive into the world of crisp, clear sound recording without the need for a deluxe home studio? Whether you're itching to share your podcast with the world, ace that upcoming presentation, or narrate the next bestselling audiobook, you've landed at the right spot.
In today’s bustling digital landscape, having the ability to record high-quality audio right from your laptop can set you apart. And guess what? It's nowhere near as complicated as it may seem! With a few insider tips and tricks, you'll be producing studio-quality sounds from the comfort of your desk, couch, or whatever nook you call your workspace.
By following the three simplistically brilliant steps we're about to explore, you'll conquer common audio dilemmas and elevate your recording game. We're talking about solutions that are not only effective but also budget-friendly and accessible, ensuring you start off on the right note.
So, tighten your seatbelt and prepare for takeoff — we’re about to embark on a sonic journey that will transform your laptop into an audio recording powerhouse!
Step #01 - Recognizing Common Audio Recording Problems on Laptops

Hey there, audio aficionados! Before we dive into the "hows," let's chat about the "whys"—specifically, why recording directly on your laptop can sometimes make you want to pull your hair out. Imagine this: You just nailed your podcast episode, only to play it back and find it's more "static symphony" than "crisp clarity." Frustrating, right? It all boils down to two pesky culprits: fan noise and electrical noise.
First up, fan noise. This sneaky saboteur lives within your laptop. It's like a little noise ninja, always ready to jump into your recordings. As your laptop works harder, especially while pulling off some serious multitasking during a recording session, the fan kicks into high gear to keep things cool. The result? A constant whirring hum that can overshadow your dulcet tones.
Secondly, we have the electrical noise. Unlike your typical background noise that can be controlled, this type starts an unexpected duet with your voice, and not the harmonious kind. It's an annoying buzz that's not too different from a pesky mosquito, except it's coming from your laptop and can be traced back to the power supply when your device is plugged in.
Here's the good news: Both problems have manageable solutions, which we'll get into in the next sections. So, don't let these issues discourage you; we're about to make them a thing of the past! Keep that enthusiasm fired up, because crystal-clear audio is just around the corner.
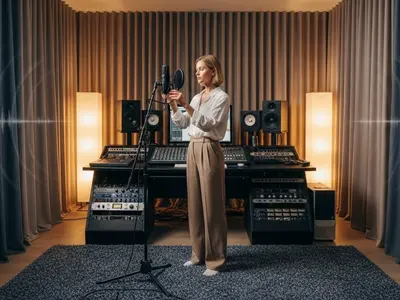
Step #02 - The Ideal Solution: External Microphones

Hey there, audiophiles and creators! Are you ready to kick those frustrating laptop fan noises to the curb? Well, it’s time to dive into the game-changing step of using an external microphone. It's a fact: built-in laptop mics are often not up to par. They pick up everything, from your furnace's hum to your laptop's whirring fan, when all you want is crystal clear audio.
The External Microphone Advantage
Investing in an external USB microphone —or if you have it, a mic with a p2 (3.5mm) connection—is your golden ticket to audio excellence. Not only do these beauties offer superior sound quality, but they also provide a level of flexibility you just can’t get from your laptop’s onboard mic.
Position Perfect
Let's set the scene for success. Position your mic at least one meter away from your laptop. Why that magic number, you ask? This simple distance helps to keep your microphone blissfully ignorant of any fan noise your laptop decides to belt out, ensuring that the only thing it captures is your smooth, clear voice.
Mic Selection Matters
Choosing the right microphone can feel like a quest, but fear not! A cardioid pattern USB microphone is often recommended, which does a stellar job at capturing sound from the front and sidelining any unwanted noise from behind the mic.
Sound Check 1, 2, 3
Before you hit record, do a quick test. Monitor the sound levels, make sure there's no background fuzz, and adjust your setup if necessary. With a little bit of trial and error, you'll find the sweet spot for your mic placement and be on your way to achieving that studio-quality sound , right from your cozy corner.Remember, friends, with an external microphone in your arsenal, you’re taking a massive step towards audio recordings that sound professional, immersive, and downright impressive. So plug in, position well, and prepare to be heard like never before!
Step #03 - Handling Electrical Noise Interference

Ever experience that pesky electrical hum while recording and wonder where it's coming from? You're not alone—electrical noise interference is a common headache for laptop-based recordings. But don't let it discourage you from creating crystal-clear audio content!
Imagine you've just crafted the perfect podcast episode, only to find it's overshadowed by an unwanted buzzing sound. The culprit? Often, it's the laptop's power supply. When plugged in, power supplies can emit a buzzing that sneaks into your audio like an uninvited guest. The good news is, there's a remarkably straightforward fix.
Here's the secret: switch to battery mode when you record. That’s right—simply unplugging your laptop during recordings can significantly reduce, if not eliminate, electrical interference. This trick helps silence that buzzing and lets your content’s true quality shine through.
Now, you might be concerned about your laptop's battery life. Worry not! Most laptops, when fully charged, will give you ample time to capture your voiceovers, narrations, or musical genius. Just make sure to charge up before you dive into recording, and you'll be good to go.
By recording on battery power, you're taking an easy step toward professional-sounding audio. No fuss. No buzz. Just your clear, pristine voice or instruments coming through. So next time, before you hit that record button, pull the plug—literally—and let your talent be the only thing that's heard!
Step Up Your Recording with Audacity
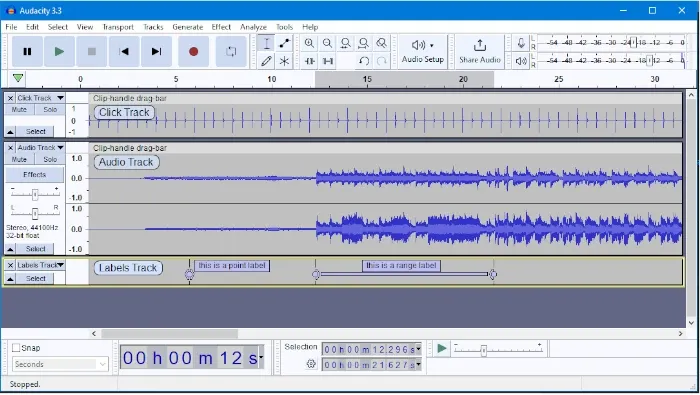
Great strides have been made in your quest for crystal-clear audio recordings on your laptop, but the journey doesn't end there! It's time to shift from the basics to something that offers you more authority over your craft – and that's where Audacity enters the picture.
Audacity is a formidable ally in the audio recording and editing realm. This nifty tool is free, open-source, and available across various platforms. Whether you're a Windows, Mac, or Linux user, Audacity is tailored to fit.
Take Control
So why choose Audacity? For starters, control. You see, the built-in sound recorder on your laptop might be convenient, but it's kinda like riding a bike with training wheels. It gets you moving, but you're craving the freedom to maneuver. When you switch to Audacity, you’re saying goodbye to those limits. You're taking the training wheels off and you get to control every aspect of the recording process, from the signal input levels to noise reduction , and even EQ settings! Now, doesn't that sound like music to your ears?
Let's Customize
Let's talk about customization. With Audacity, your recording sessions can be tailored to perfection. You can effortlessly adjust the input levels to avoid distortion, ensuring your final audio is just the right mix of crisp and clear. Plus, say you make a mistake or a rogue noise slips through, no problem – you can snip that out faster than a DJ drops a beat. The power to refine and polish your audio is literally at your fingertips.
Spread Audio Everywhere
Moving on to flexibility in file formats. Once you're done recording and editing, you might want to share your masterpiece with the world or at least save it for future use. Audacity has got you covered with its ability to export in various audio formats. Want to keep things lossless with a WAV file? Go for it. Need an MP3 for easy sharing? Sure thing! You name it, Audacity exports it.
To dive into Audacity, all you need to do is download the program from its official website. It's user-friendly, but if you’re feeling a bit lost, there are tons of tutorials available online that break down the ins and outs – from your first recording to advanced techniques.
Remember, with the right recording conditions and the power of Audacity, you're well on your way to producing audio that rivals that of a professional studio. So, embrace this change, and let Audacity turbo-charge your audio recording journey. Your listeners will thank you when they hear the exceptional quality you're delivering.
Conclusion & Motivation: Your Journey to Crystal-Clear Audio Starts Now!
Well, fellow audio enthusiasts, we've navigated through the ups and downs of laptop audio recording together, and look at you now – ready to make waves with your very own high-quality audio. Isn't it electrifying to know that with just a few tweaks, your laptop can transform into a powerful recording tool?
Remember, the obstacles to pristine sound quality, like that pesky fan noise or the random electrical buzz, are but minor hurdles. With an external microphone in hand and your laptop running on battery mode, you're primed to capture audio so clean, listeners will think you're broadcasting from a professional studio.
And let's not forget the magic wand that is Audacity – this audio editing software is your trusty sidekick, giving you the superpowers to fine-tune input levels and play with a variety of audio formats until your heart's content. It's free, user-friendly, and an absolute game-changer for your recordings.
So, don't let another day pass with your stories, podcasts, or voiceovers sounding less than fabulous. Dive into the world of crisp, clear audio recording. Your laptop is capable of so much more than you think, and you are capable of creating audio masterpieces that resonate and impact.
Let's turn those recording dreams into reality. Step up to the mic – your audience awaits!
And hey, if you ever hit a bump in your recording journey, remember that this community is here to support you. Drop your questions, share your experiences, and let's continue to grow together. Your first quality recording is just the beginning; it's time to aim for the stars and produce audio wonders that you and your listeners will adore!
Ready to start? I can hear your future fans cheering already!
Rodrigo Marques
Rodrigo Marques, founder of Home Studio Start, is a music production veteran with over 25 years of experience. Since 1997, he has mastered tools like Sound Forge, Samplitude Pro, and VST plugins, producing albums for emerging artists globally. Creator of the innovative Formula HSS for mixing and mastering, Rodrigo has empowered thousands through online courses and his ebook, Home Studio Start. Dedicated to democratizing music production, he equips aspiring artists with skills for professional-grade music and sustainable careers.
About the author