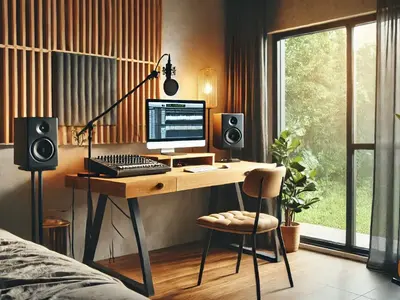
Recording vocals is one of the most rewarding and challenging aspects of producing music in your home studio. Whether you are a singer, a rapper, a podcaster, or a voice-over artist, you want your vocals to sound clear, crisp, and professional. However, recording vocals in your home studio can be tricky, as you may face some common issues such as pops, blasts, noises, reverberations, and level fluctuations. How can you overcome these challenges and achieve a high-quality vocal sound in your personal recording studio?
In this blog post, I will share with you five amazing tips that will help you record vocals in your home studio like a pro. These tips will cover topics such as how to use an anti-pop filter, how to check the acoustics of your room, how to filter the lowest frequencies, how to use a compressor, and how to use delay instead of reverb. By following these tips, you will be able to improve the quality of your vocal recordings and create a sense of space and depth in your mix. You will also learn some technical terms and concepts that will enhance your understanding of vocal production.
So, if you are ready to take your vocal recordings to the next level, let’s get started!
Tip 1: Use an Anti-pop Filter

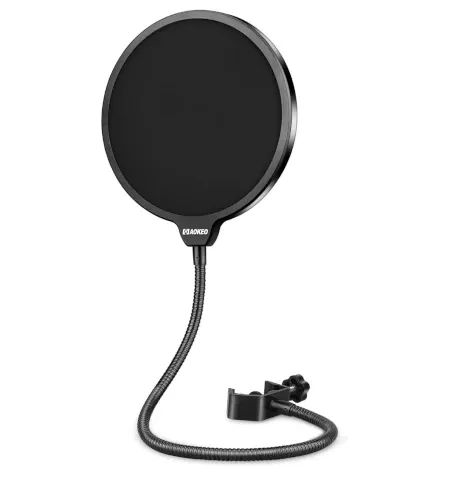
One of the simplest and most effective ways to improve the quality of your vocal recordings is to use an anti-pop filter. An anti-pop filter is a device that is placed in front of the microphone to reduce the pops and blasts that are produced by the vocalist’s breath. These pops and blasts can cause distortion and clipping in your recordings, making them sound harsh and unpleasant.
An anti-pop filter works by creating a barrier between the vocalist’s mouth and the microphone, preventing the direct impact of the air pressure on the microphone’s diaphragm. The filter also diffuses the air flow, reducing the plosive sounds that are generated by the consonants P, B, T, and K. By using an anti-pop filter, you can achieve a smoother and cleaner vocal sound, without losing the clarity and presence of your voice.
As an Amazon Associate I earn from qualifying purchases.
There are different types of anti-pop filters available on the market, such as metal mesh, nylon, and foam. You can buy a couple of them from Amazon for a very affordable price. Some microphones also come with a built-in pop filter, but they may not be as effective as a separate one. To use an anti-pop filter properly, you should attach it to a stand or a boom arm and position it about 2 to 6 inches away from the microphone. You should also adjust the angle and distance of the filter according to the vocalist’s performance and preference.
Using an anti-pop filter is not only beneficial for your vocal recordings, but also for your microphone. It can protect your microphone from saliva, dust, and moisture, extending its lifespan and performance. It can also help you avoid feedback and unwanted noises, especially if you are recording in a noisy environment.
So, if you want to record vocals in your home studio with a professional quality , don’t forget to use an anti-pop filter. It will make a huge difference in your sound and save you a lot of time and trouble in the editing and mixing process.
Tip 2: Check the Acoustics
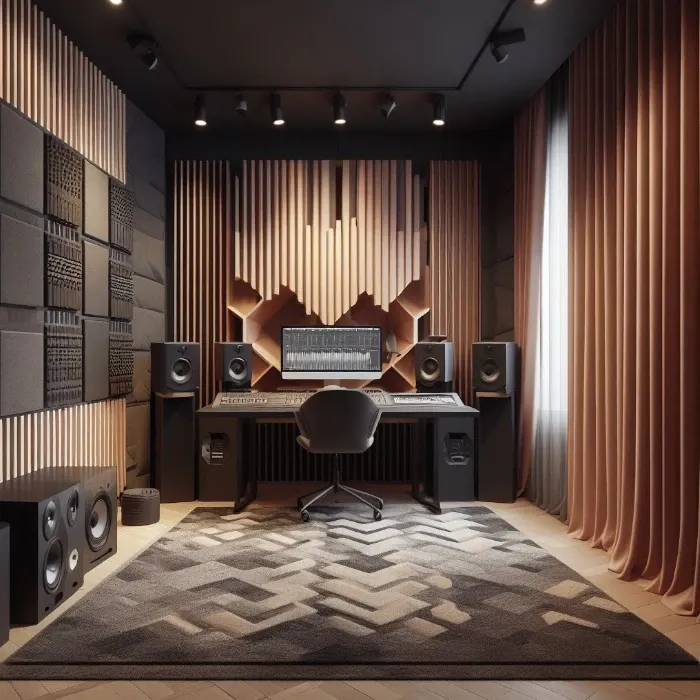
Another important factor that can affect the quality of your vocal recordings is the acoustics of the room where you are recording. The acoustics of a room refers to how sound waves behave and interact with the surfaces and objects in the room, such as walls, floors, ceilings, windows, doors, furniture, etc. The acoustics of a room can create two main problems for your vocal recordings: reverberations and reflections.
Reverberations are the echoes that are produced when sound waves bounce off multiple surfaces in the room, creating a sense of space and ambience. However, too much reverberation can make your vocals sound muddy, distant, and unclear, especially if you are recording in a large or empty room. To reduce the reverberations in your room, you should use some materials that can absorb or diffuse the sound waves, such as carpets, rugs, curtains, blankets, pillows, foam panels, etc. You can also use some furniture or bookshelves to create some irregularities and variations in the room, which can help break up the sound waves and prevent them from building up.
Reflections are the direct echoes that are produced when sound waves bounce off a single surface in the room, such as a wall or a window, creating a phase cancellation effect. Phase cancellation occurs when two sound waves of the same frequency and amplitude meet at the opposite phase, canceling each other out and reducing the volume and quality of the sound. To avoid reflections in your room, you should use some materials that can isolate or block the sound waves, such as acoustic panels, bass traps, isolation shields, etc. You can also use some techniques to change the angle and position of the microphone and the vocalist, such as moving away from the walls or windows, or using a cardioid or a supercardioid microphone pattern , which can reject the sound coming from the back or the sides of the microphone.
When you record vocals in your home studio, you should aim for a balanced and controlled acoustic environment, where you can capture the natural and authentic sound of your voice, without adding too much or too little reverberation or reflection. A good way to check the acoustics of your room is to use a clap test, which consists of clapping your hands in different spots of the room and listening to the sound quality and decay. You can also use a spectrum analyzer or a frequency response graph to measure the frequency response and the acoustic properties of your room.
By checking the acoustics of your room and applying some acoustic treatment, you can improve the quality of your vocal recordings and create a more professional and pleasant sound for your listeners. You don’t need to spend a lot of money or time to achieve a decent acoustic environment for your home studio, you just need to use some common sense and some creativity.
Tip 3: Filter the Lowest Frequencies
One of the common sources of noise and interference in your vocal recordings is the lowest frequencies, which are usually below 100Hz. These frequencies are produced by various factors, such as the rumble of the microphone, the vibration of the microphone stand, the movement of the vocalist, the wind, the traffic, the air conditioning, etc. These frequencies can affect the quality and clarity of your vocal sound, making it sound muddy, boomy, or noisy.
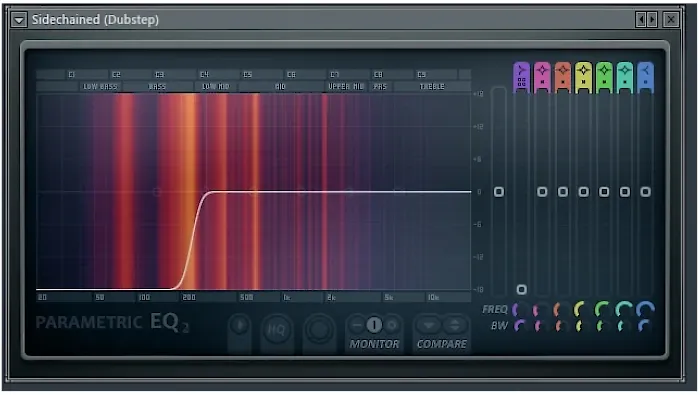
To filter out these lowest frequencies, you can use a high-pass filter, which is a device or a plugin that allows the high frequencies to pass through and cuts off the low frequencies. A high-pass filter can help you remove the unwanted noises and rumbles from your vocal recordings, leaving only the essential and audible frequencies of your voice.
A high-pass filter can be applied either during the recording or during the editing and mixing process. If you want to apply a high-pass filter during the recording, you can use a microphone that has a built-in high-pass filter, such as the Shure SM58 or the Rode NT1-A. You can also use a preamp, a mixer, or an audio interface that has a high-pass filter option, such as the Focusrite Scarlett 2i2 or the Behringer Xenyx Q802USB. You can adjust the frequency cutoff of the high-pass filter according to your preference and the characteristics of your voice, but a general rule of thumb is to set it between 80Hz and 120Hz.
If you want to apply a high-pass filter during the editing and mixing process, you can use a software or a plugin that has a high-pass filter feature, such as Audacity, Reaper, or EQ plugins. You can use the same frequency cutoff as mentioned above, or you can use a spectrum analyzer or a frequency response graph to find the optimal frequency cutoff for your vocal track. You can also use a slope or a Q factor to control how steep or smooth the high-pass filter is.
By using a high-pass filter, you can filter out the lowest frequencies from your vocal recordings and improve the quality and clarity of your vocal sound. You can also prevent the lowest frequencies from interfering with other instruments in the mix, such as the bass or the kick drum, which can create a more balanced and harmonious sound. A high-pass filter is a simple and effective tool that can make a big difference in your vocal production.
Tip 4: Use a Compressor
One of the most common and useful effects for vocal recordings is compression. Compression is a process that reduces the dynamic range of a sound, which is the difference between the loudest and the quietest parts of the sound. Compression can help you control the vocal levels and dynamics within the mix, making them more consistent and balanced.
Compression works by applying a gain reduction to the sound when it exceeds a certain level, called the threshold. The amount of gain reduction applied is determined by the ratio, which is the ratio between the input and the output levels. For example, a ratio of 4:1 means that for every 4dB of input above the threshold, the output will be 1dB. The speed at which the compression starts and stops is controlled by the attack and release times, which are measured in milliseconds. The attack time is the time it takes for the compressor to reach the full gain reduction after the sound crosses the threshold, while the release time is the time it takes for the compressor to return to the original level after the sound falls below the threshold. The output level of the compressed sound can be adjusted by the make-up gain, which is the amount of gain added to the output to compensate for the loss of volume caused by the compression.
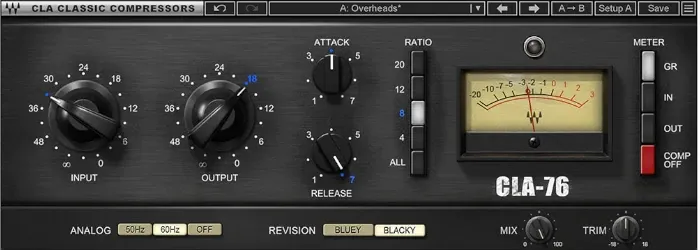
Compression can be applied either during the recording or during the editing and mixing process. If you want to apply compression during the recording, you can use a hardware compressor, such as the DBX 266XS or the Warm Audio WA76, which are connected between the microphone and the audio interface. You can also use a software compressor, such as the Waves CLA-76 or the FabFilter Pro-C 2, which are inserted as plugins in your recording software. You can adjust the parameters of the compressor according to your preference and the characteristics of your voice, but a general rule of thumb is to set a moderate threshold, a low to medium ratio, a fast attack, a slow release, and a moderate make-up gain.
If you want to apply compression during the editing and mixing process, you can use the same software compressors as mentioned above, or you can use some other plugins that have compression features, such as vocal processors, channel strips, or multiband compressors. You can use the same parameters as mentioned above, or you can use some presets or templates that are designed for vocals, such as the Waves Vocal Rider or the iZotope Nectar 3 . You can also use some techniques to fine-tune the compression, such as parallel compression, which is a technique that blends the original sound with the compressed sound, creating a more natural and dynamic sound, or sidechain compression, which is a technique that triggers the compression based on the level of another sound, such as the kick drum, creating a more rhythmic and groovy sound.
By using compression, you can enhance the quality and clarity of your vocal recordings and make them more compatible and competitive with other instruments in the mix. Compression can also add some character and color to your vocal sound, making it more expressive and engaging. Compression is a powerful and versatile tool that can make a big difference in your vocal production.
Tip 5: Try To Use Delay Instead of Reverb
One of the most popular and widely used effects for vocal recordings is reverb. Reverb is a process that simulates the sound of a space, such as a room, a hall, a cathedral, etc. Reverb can add some depth and dimension to your vocal sound, making it sound more spacious and natural. However, reverb can also have some drawbacks, such as making your vocals sound distant, muddy, or washed out, especially if you use too much or too little of it. Reverb can also interfere with other instruments in the mix, creating a cluttered and messy sound.
That’s why you may want to try to use delay instead of reverb for your vocal recordings. Delay is a process that creates a series of echoes or repetitions of the original sound, creating a sense of movement and rhythm. Delay can also add some depth and dimension to your vocal sound, making it sound more lively and interesting. However, delay can also have some advantages over reverb, such as making your vocals sound more present, clear, and focused, especially if you use it subtly and tastefully. Delay can also blend better with other instruments in the mix, creating a more coherent and harmonious sound.
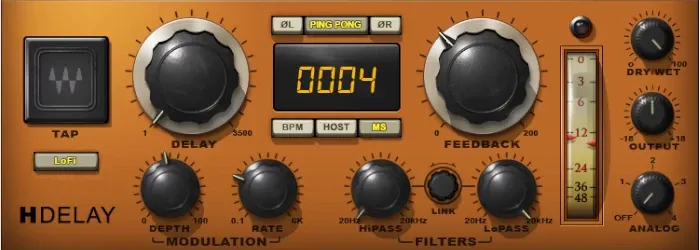
There are different types of delay effects available, such as analog delay, digital delay, tape delay, ping-pong delay, etc. You can also use some plugins that have delay features, such as the Waves H-Delay or the Soundtoys EchoBoy . You can adjust the parameters of the delay effect according to your preference and the characteristics of your voice, but a general rule of thumb is to set a short delay time, a low feedback, a low mix, and a high cut. You can also use some techniques to enhance the delay effect, such as modulation, which is a technique that adds some variation and movement to the delay sound, creating a more organic and realistic sound, or automation, which is a technique that changes the parameters of the delay effect over time, creating a more dynamic and expressive sound.
By using delay instead of reverb, you can create a more professional and pleasant vocal sound for your listeners. Delay can also add some character and flavor to your vocal sound, making it more unique and memorable. Delay is a creative and versatile tool that can make a big difference in your vocal production.
Conclusion
In this blog post, you have learned five amazing tips that will help you record vocals in your home studio like a pro. These tips are:
- Use an anti-pop filter to reduce the pops and blasts produced by the vocalist’s breath.
- Check the acoustics of your room and apply some acoustic treatment to reduce the reverberations and reflections that can affect the sound quality.
- Filter the lowest frequencies from your vocal recordings to remove the unwanted noises and rumbles that can make your sound muddy, boomy, or noisy.
- Use a compressor to control the vocal levels and dynamics within the mix, making them more consistent and balanced.
- Use delay instead of reverb to create a sense of space and depth in your vocal sound, making them more present, clear, and focused.
By following these tips, you will be able to improve the quality of your vocal recordings and create a more professional and pleasant sound for your listeners. You will also learn some technical terms and concepts that will enhance your understanding of vocal production.
I hope you enjoyed this blog post and found it useful and informative. If you have any questions or comments, please feel free to leave them below. Thank you for reading and happy recording!
Rodrigo Marques
Rodrigo Marques, founder of Home Studio Start, is a music production veteran with over 25 years of experience. Since 1997, he has mastered tools like Sound Forge, Samplitude Pro, and VST plugins, producing albums for emerging artists globally. Creator of the innovative Formula HSS for mixing and mastering, Rodrigo has empowered thousands through online courses and his ebook, Home Studio Start. Dedicated to democratizing music production, he equips aspiring artists with skills for professional-grade music and sustainable careers.
About the author