Welcome to the exciting journey of transforming your home space into a sanctuary of sound. Whether you're a budding musician, a seasoned producer, or simply a music enthusiast eager to dabble in the art of sound creation, the path to achieving pristine audio begins in an often-overlooked aspect of music production: home studio acoustics.
Imagine the difference between strumming a chord in a vast, echoing cathedral versus a cozy, soundproof room. The environment dramatically influences how sound waves travel and, consequently, how we perceive sound quality. This is why understanding and optimizing the acoustics of your home studio is paramount. It’s not just about the right equipment; it’s about creating a space where sound can flourish, unimpeded by the common pitfalls of echo, noise pollution, and sound leakage.
In this blog post, we dive deep into the heart of home studio acoustics. We'll guide you through selecting the perfect room, understanding the challenges and solutions for soundproofing, and fine-tuning your space to capture the essence of your music.
Let's embark on this sonic adventure, ensuring that by the end, your home studio is not just a room, but a haven for the music you create. A place where every sound is a testament to your artistry, and every recording, a masterpiece waiting to be heard. Welcome to the world of superior sound.
Choosing the Right Room
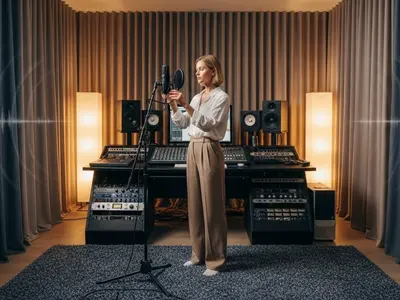
Embarking on the journey to refine your home studio's acoustics begins with one critical decision: selecting the ideal room. This choice is foundational, shaping the potential of every sound, every recording, and every musical creation that will emerge from your space. The right room serves as the cornerstone for pristine sound quality, setting the stage for all subsequent acoustic enhancements .
The Quest for Quiet
At the heart of this decision is the quest for a space that minimizes external noise and internal echoes —a haven where the purity of sound is paramount. Look for a room that's as far removed as possible from the household's hustle and bustle. High-traffic areas, like near the kitchen, living room, or garage, are less than ideal due to the potential for sound leakage and external noise intrusion.
Considering Room Dynamics
Beyond just noise levels, the physical characteristics of the room play a significant role. Size, shape, and even ceiling height can impact how sound waves travel and interact within the space. A room too small may feel cramped and limit sound diffusion, while a room too large may introduce unwanted echoes. Similarly, rooms with unusual shapes or high ceilings require thoughtful treatment to achieve balanced acoustics.
The Initial Audit
Before settling on a room, conduct an initial audit. Listen for any external noises that may penetrate the space and observe how sound behaves within it. Clap your hands or play a short piece of music to gauge the natural reverb and sound clarity. This simple test can reveal much about the room's potential as a conducive environment for sound recording and production.Selecting the right room for your home studio is about more than convenience. It's about creating a controlled environment where sound can be precisely managed and manipulated, ensuring that your musical creations are captured just as you envision. With the right room as your foundation, the path to acoustic perfection becomes clearer and more attainable.
The Challenge of Parallel Walls
After settling on the ideal room for your home studio, the next obstacle to tackle is the challenge posed by parallel walls. This architectural feature, common in most rooms, can inadvertently become the adversary of clear and balanced sound. Understanding the impact of parallel walls on your studio's acoustics is crucial for mitigating potential issues and enhancing the overall sound quality of your recordings.
The Problem with Parallelism
Parallel walls can create a phenomenon known as standing waves . These are sound waves that bounce back and forth between the walls, amplifying certain frequencies while cancelling others. This effect can lead to uneven bass response, making some notes disproportionately loud and others too quiet. The result is a distorted representation of your music, which can be particularly problematic during the mixing and mastering stages.
Breaking the Cycle
The key to overcoming the challenge of parallel walls lies in breaking up the symmetry that allows standing waves to form. This can be achieved through a variety of means, each designed to disrupt the straight path that sound waves travel between parallel surfaces. Here are a few strategies:
- Angling the Walls: If you're in the process of building or can make structural changes, angling the walls slightly can prevent standing waves by ensuring that sound waves don't bounce directly back and forth.
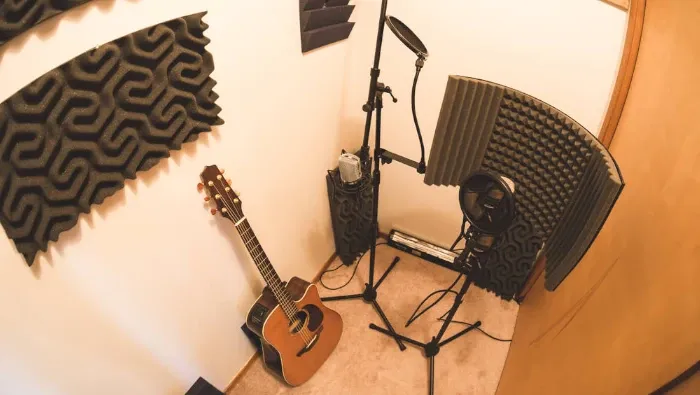
- Adding Diffusers: Diffusers scatter sound waves in various directions, disrupting standing waves. They can be strategically placed on walls to break up sound reflections and enhance the richness of the audio within the room.
- Applying Absorptive Materials: While not directly altering the parallel nature of the walls, using absorptive materials like acoustic foam or panels can reduce the energy of the sound waves bouncing between them, minimizing the formation of standing waves.
- Strategic Furniture Placement: Sometimes, the solution can be as simple as rearranging your studio. Placing bookshelves, couches, or even large plants along the walls can help break up sound waves and add variability to the room's acoustics.
Addressing the challenge of parallel walls is about creating an environment where sound behaves predictably and naturally. By employing one or more of these strategies, you can significantly improve the acoustic quality of your home studio , ensuring that your recordings faithfully capture the nuances of your music. This proactive approach lays the groundwork for a space where creativity and sound quality harmonize, allowing your musical talents to shine.
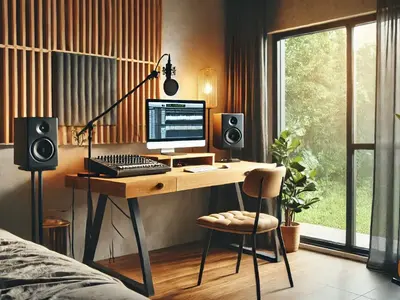
Mastering Monitor Placement
Once you've navigated the selection of the right room and mitigated the challenges posed by parallel walls, mastering the placement of your audio monitors becomes the next crucial step. Correct monitor placement is essential for achieving a true soundstage, where every note and nuance of your music is accurately reproduced. This precision ensures that the music you produce in your home studio translates well across various listening environments.
Understanding the Sweet Spot
The "sweet spot" is an area where the sound from your monitors converges optimally, providing the most balanced audio experience. Achieving this requires careful consideration of both the distance between monitors and their angle relative to your listening position. Ideally, your monitors and listening position should form an equilateral triangle, with each monitor angled slightly towards you. This setup ensures that sound waves from the monitors reach your ears simultaneously, minimizing phase issues and maximizing stereo imaging.
The Role of Room Boundaries
Room boundaries, including walls, the ceiling, and the floor, significantly influence how sound interacts within your studio. Placing monitors too close to walls, especially corners, can exaggerate bass frequencies due to boundary reinforcement. To avoid this, try to maintain a distance of at least a few feet between your monitors and the nearest wall, and consider using bass traps in corners to absorb low-frequency build-up.
Monitor Height and Tilt
The vertical positioning of your monitors also plays a pivotal role in sound quality. Ideally, the tweeters should be at ear level, ensuring that high frequencies are directed straight towards your ears. If your monitors cannot be positioned at ear level, tilting them so that the tweeters aim at your listening position can help compensate for the height discrepancy.
Dealing with Reflections
Reflective surfaces near your monitors can cause early reflections, which interfere with the direct sound coming from the speakers, blurring the audio image. To mitigate this, you can place acoustic panels at reflection points on walls, ceilings, and even floors. A simple method to identify these points is the mirror test: while sitting in your listening position, have someone move a mirror along the wall. Wherever you can see the monitor's tweeter in the mirror is a potential reflection point that could benefit from acoustic treatment.Mastering monitor placement is not just about following guidelines but about listening and adjusting based on the unique characteristics of your room and equipment. By paying close attention to these aspects, you create an environment where your monitors perform at their best, allowing your music to reach its full potential.
Balancing Absorption

With the right room chosen, challenges of parallel walls addressed, and monitors meticulously placed, your home studio is shaping up beautifully. Yet, there's another critical aspect to consider for optimal acoustics: balancing absorption. This step is about fine-tuning your space to prevent it from being too reverberant or too dead-sounding, both of which can significantly affect your ability to make sound decisions during recording and mixing .
Absorption vs. Reflection: Finding the Middle Ground
The goal of acoustic treatment is not to eliminate all reflections but to control them, maintaining a balance between absorption and liveliness. Too much absorption can make a room sound unnaturally dead, which might be detrimental when recording certain types of music or instruments that benefit from a bit of natural ambiance. On the other hand, too little absorption leads to excessive reverb and echo, muddying your sound and masking the finer details in your mix.
Choosing the Right Materials
The type and placement of absorptive materials can dramatically influence your studio's sound. Materials like open-celled foam or dense fabric panels are great for absorbing mid to high frequencies, while bass traps are designed to deal with lower frequencies that tend to accumulate in corners and along wall boundaries.
- Strategic Placement: Focus on key areas like the points of first reflection (the first places on your walls where sound from the monitors bounces off towards your listening position), the wall behind your monitors, and the ceiling above your mixing position. These areas are critical in controlling early reflections that can color your sound.
- Variety in Absorption: Using a mix of absorption materials helps target a broader range of frequencies. For example, combining rigid fiberglass panels with softer, more porous materials can effectively absorb across a wide spectrum of sound.
Testing and Adjusting
The effectiveness of your absorption strategy should be tested and adjusted as necessary. Playing a variety of music and using tools like room analysis software can help identify frequency imbalances and areas where sound may be overly dampened or too lively. Listening is key—trust your ears and make adjustments based on how your mixes translate to other listening environments.
Absorption with Aesthetics
Lastly, it's important to remember that your studio is not just a technical space but also a creative one. The aesthetic approach to placing absorptive materials can enhance the studio vibe, contributing to a more inspiring environment. Consider the visual impact of your acoustic treatments and how they can be integrated into your studio's design.Balancing absorption in your home studio is a nuanced process, requiring a blend of science, listening, and creativity. By carefully selecting and placing acoustic treatments, you can create a sonically balanced space that allows for clear, accurate sound reproduction—ultimately supporting the production of music that sounds great in any environment.
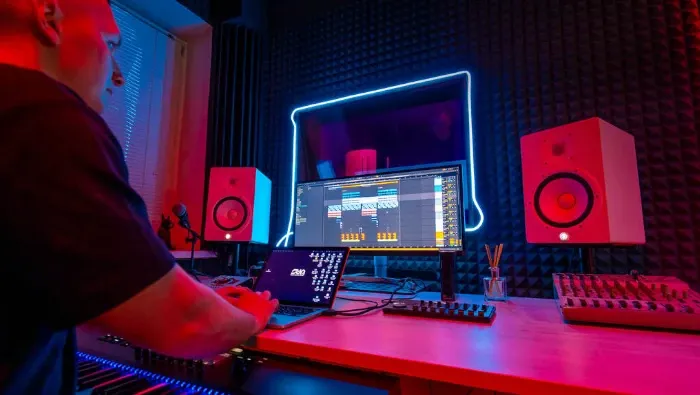
Testing and Tuning Acoustics
After addressing room choice, parallel wall challenges, monitor placement, and the balance of absorption, your home studio is on the brink of acoustic perfection. Yet, the final touch in this process involves testing and tuning your space's acoustics to ensure every adjustment has contributed positively to your sound environment. This phase is crucial; it’s about verifying that your studio facilitates accurate sound reproduction and supports your creative process seamlessly.
The Importance of Acoustic Measurement
Acoustic measurement involves using specialized tools and software to analyze how sound behaves in your studio. These measurements can reveal issues like frequency imbalances, standing waves, and areas of excessive absorption or reflection that may not be immediately apparent to the ear. Tools like SPL (sound pressure level) meters and room analysis software provide visual feedback on your room's acoustic properties, helping you make informed decisions about further adjustments.
Employing the Right Tools
- Room Analysis Software: There are various software options available, ranging from professional-grade to free apps, that can analyze your room's frequency response. By playing test tones through your monitors and measuring the response at your listening position, you can identify problematic frequencies that need attention.- Reference Microphones: A calibrated reference microphone is essential for accurate room analysis. These microphones are designed to have a flat response across all frequencies, ensuring that the measurements you take are precise and reliable.
Practical Tests and Adjustments
- The Mirror Test for Reflections: This simple yet effective test involves moving a mirror along the walls of your studio while seated in your mixing position. Anywhere you can see the reflection of your monitors in the mirror is a potential reflection point that could benefit from acoustic treatment.- The Clap Test: Clapping your hands in the studio and listening for echo characteristics can provide immediate feedback on your room's reverberation . It's a quick way to gauge the effectiveness of your acoustic treatments and identify areas that may require additional attention.
Fine-Tuning Based on Results
Based on the results of your tests, you may need to make further adjustments. This could involve repositioning absorptive panels, adding diffusers to scatter reflections, or even adjusting the placement of your furniture and equipment to optimize sound distribution. The goal is to achieve a balanced, neutral environment where sound is neither overly dampened nor excessively reverberant.
Continuous Improvement
Remember, the quest for perfect acoustics is an ongoing process. As you change equipment, add new instruments, or even alter your studio's layout, the acoustic characteristics of your space will evolve. Regular testing and tuning allow you to maintain an optimal listening environment that supports your music production endeavors.Testing and tuning your studio's acoustics solidify the efforts you've put into creating an ideal recording and mixing environment. This final step ensures that your studio not only looks and feels professional but also meets the highest standards of sound quality, making every session within its walls a step closer to producing your best work.
Conclusion: Enjoying the Harmony of Your Efforts
As we conclude our journey through the nuanced world of home studio acoustics, it's time to step back and admire the symphony of efforts that have led to the creation of a space where sound is not just produced, but thrives. From selecting the ideal room to addressing the intricacies of parallel walls, mastering monitor placement, balancing absorption, and fine-tuning the acoustics, each step has been a critical note in the composition of your perfect studio environment.
The Reward of Precision
The meticulous attention to detail in optimizing your studio's acoustics pays off in the clarity, depth, and authenticity of the sound you capture and create. This environment now serves as a faithful canvas for your musical expressions, accurately translating your artistic vision into sonic reality. The reward is a studio that not only enhances your work but inspires your creative process.
A Living Space
Your home studio is now a living space, responsive to the subtlest nuances of sound. It's a testament to the harmony between technology and acoustics, designed to elevate your music to its highest potential. This space is your partner in the creative process, finely tuned to your needs and ready to evolve as your musical journey unfolds.
The Path Forward
The journey doesn't end here. Acoustic perfection is an ongoing pursuit, with each new project bringing insights and opportunities for refinement. Embrace this process of continuous improvement, knowing that each adjustment, no matter how small, is a step towards realizing your artistic vision.
Celebrating Your Achievements
Take a moment to celebrate the harmony of your efforts. Your dedication to creating an optimal acoustic environment reflects your commitment to your craft. As you move forward, let the quality of sound in your studio be a constant source of inspiration, driving you to explore new creative horizons and push the boundaries of what you thought possible. Your studio, with its perfected acoustics, is more than just a physical space. It's a reflection of your passion for music and your dedication to excellence. Enjoy the harmony of your efforts, and may your studio be the birthplace of many masterpieces to come.
Rodrigo Marques
Rodrigo Marques, founder of Home Studio Start, is a music production veteran with over 25 years of experience. Since 1997, he has mastered tools like Sound Forge, Samplitude Pro, and VST plugins, producing albums for emerging artists globally. Creator of the innovative Formula HSS for mixing and mastering, Rodrigo has empowered thousands through online courses and his ebook, Home Studio Start. Dedicated to democratizing music production, he equips aspiring artists with skills for professional-grade music and sustainable careers.
About the author