Do you have a passion for produce music and want to share your creations with the world? Do you dream of becoming a successful musician and making a living from your art? If you answered yes to any of these questions, then this blog post is for you!
In this post, I will show you how to create and record your own songs at home, using simple and affordable tools and techniques. You will learn how to build a home studio, compose music, produce electronic music, and use online tools to enhance your sound and reach your audience.
Whether you are a beginner or a seasoned musician, you will find something useful and inspiring in this post. By the end of it, you will be able to produce high-quality music in the comfort of your home and launch your musical career with confidence and enthusiasm.
Are you ready to unleash your musical potential? Then let’s get started!
Building a Home Studio
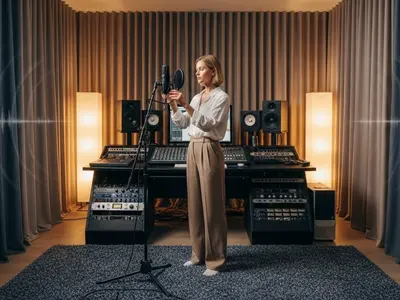
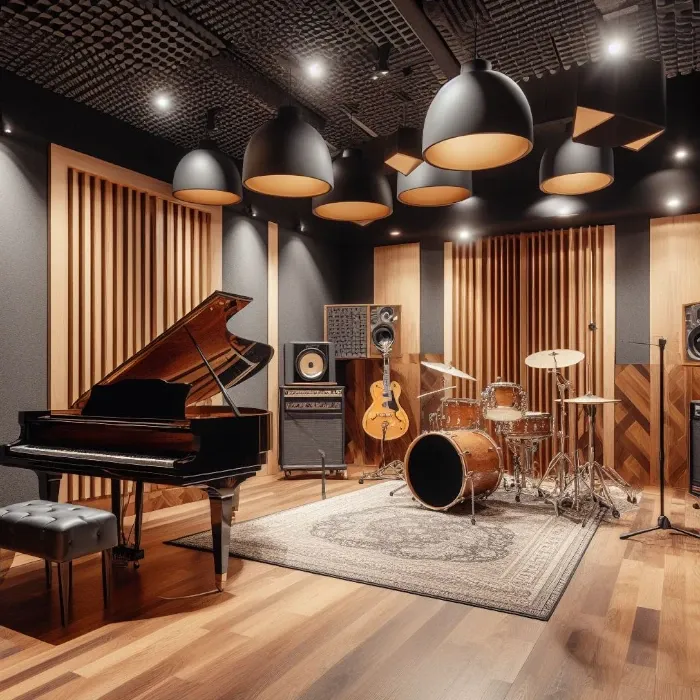
One of the most important steps in creating and recording your own music is to have a suitable space where you can work comfortably and efficiently. A home studio is a personal and customized environment where you can unleash your creativity and produce high-quality sound. However, building a home studio can be a daunting and expensive task if you don’t know what you are doing. That’s why I will guide you through the essential aspects of setting up a home studio, such as choosing the best location, flooring, isolation, acoustic treatment, and equipment.
Choosing the best location
The first thing you need to consider when building a home studio is where you are going to place it. Ideally, you want a room that is quiet, spacious, and well-insulated from external noise and vibrations. You also want a room that has good acoustics, meaning that it doesn’t have too much echo, reverb, or resonance. A room with hardwood, concrete, or tile flooring is preferable to a carpeted one, as carpet absorbs high-frequency sounds but not low ones. A room with asymmetrical walls, high ceilings, and irregular surfaces is also better than a symmetrical, low-ceilinged, and flat one, as these features help to disperse and diffuse sound waves.
If possible, avoid rooms that have windows, as they can let in unwanted noise and light, and can also create reflections and standing waves. If you have no choice but to use a room with windows, you can cover them with heavy curtains, blankets, or foam panels. You should also avoid rooms that have appliances, pipes, or vents that can make noise or interfere with your sound.
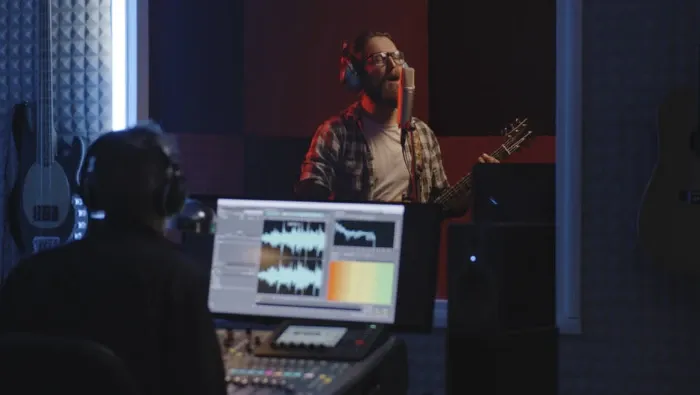
Depending on the size and type of music you want to record, you may need more than one room for your home studio. For example, if you want to record live instruments or vocals, you may need a separate room for the performers, called the live room, and another room for the engineer, called the control room. The live room is where the sound is captured, and the control room is where the sound is processed, edited, and mixed. You may also need one or more small rooms, called booths or isolation booths, where you can isolate individual instruments or vocalists for cleaner and more focused recordings.
Flooring
The flooring of your home studio can have a significant impact on the sound quality and acoustics of your room. As mentioned before, you should avoid carpeted floors, as they can absorb high-frequency sounds and create an unbalanced and muddy sound. Instead, you should opt for hard and smooth floors, such as hardwood, concrete, or tile, as they can reflect sound waves more evenly and accurately. However, you should also be careful not to have too much reflection, as this can create echo, reverb, and feedback. To avoid this, you can use rugs, mats, or carpets to cover some parts of the floor and create a more balanced and controlled sound.
Isolation / Soundproofing
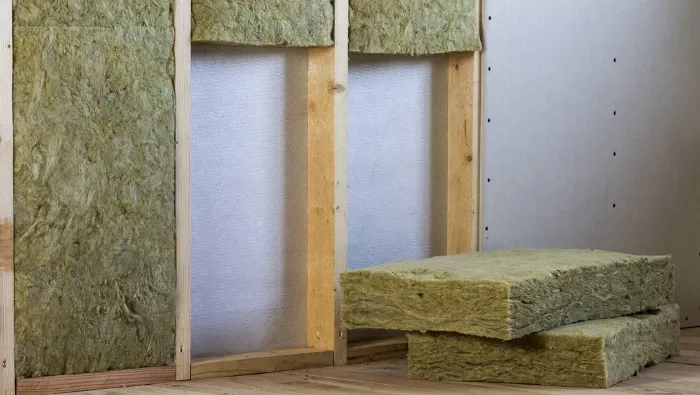
One of the biggest challenges of building a home studio is to isolate it from external noise and vibrations, as well as to prevent your sound from leaking out and disturbing your neighbors. This process is called soundproofing, and it involves creating a barrier between your studio and the outside world. Soundproofing can be achieved by using various materials and techniques, such as:
- Adding mass and density to your walls, ceiling, and floor. You can do this by using thick and heavy materials, such as drywall, plywood, MDF, or concrete, to create a solid and rigid structure that can block sound waves. You can also use multiple layers of different materials, such as wood and metal, to create a sandwich-like structure that can dampen sound waves.
- Adding air gaps or cavities between your walls, ceiling, and floor. You can do this by using studs, joists, or frames to create a space between your inner and outer walls, ceiling, and floor. This space can act as a buffer zone that can absorb and dissipate sound waves. You can also fill this space with soft and porous materials, such as fiberglass, mineral wool, or foam, to further reduce sound transmission.
- Adding seals and gaskets to your doors, windows, and vents. You can do this by using rubber, foam, or silicone strips to cover any gaps or cracks that can let sound in or out. You can also use weather stripping, door sweeps, or acoustic caulk to seal the edges and corners of your doors, windows, and vents.
Acoustic Treatment
As an Amazon Associate I earn from qualifying purchases.
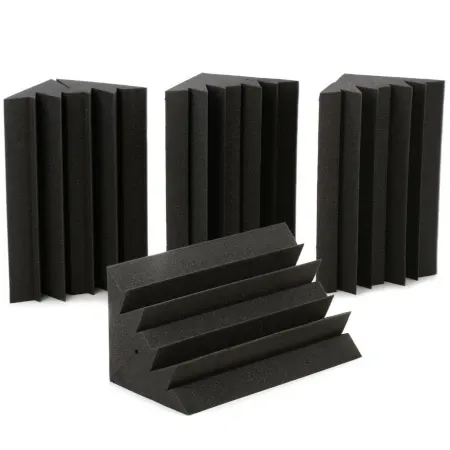
Another important aspect of building a home studio is to improve the acoustics of your room, meaning how sound behaves and sounds inside your studio. Acoustic treatment can help you to control and optimize the sound quality and clarity of your recordings and mixes. Acoustic treatment can be achieved by using various devices and techniques, such as:
- Adding absorption panels to your walls, ceiling, and corners. You can do this by using soft and porous materials, such as foam, fabric, or fiberglass, to create panels that can absorb sound waves and reduce echo, reverb, and resonance. You can also use bass traps, which are specially designed panels that can absorb low-frequency sounds and prevent them from building up in your corners.
- Adding diffusion panels to your walls and ceiling. You can do this by using hard and irregular materials, such as wood, metal, or plastic, to create panels that can scatter and disperse sound waves and create a more natural and spacious sound. You can also use diffusers, which are specially designed panels that can create a random and uniform sound field and eliminate hot spots and dead zones.
- Adding reflection panels to your walls and ceiling. You can do this by using hard and smooth materials, such as mirrors, glass, or metal, to create panels that can reflect sound waves and create a brighter and livelier sound. You can also use reflectors, which are specially designed panels that can direct and focus sound waves and enhance certain frequencies and harmonics.
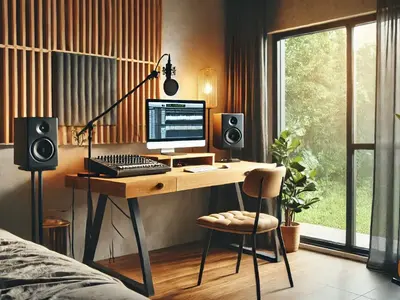
Essential Studio Equipment
The last but not least aspect of building a home studio is to equip it with the necessary gear and software that you need to record, edit, and mix your music. There are many types and brands of equipment and software that you can choose from, depending on your budget, preferences, and goals. However, there are some essential items that you should have in your home studio, such as:

As an Amazon Associate I earn from qualifying purchases.
- A computer. This is the brain and heart of your home studio, where you will store, process, and manipulate your audio files. You should have a computer that is fast, reliable, and compatible with your software and hardware. You should also have enough storage space, memory, and processing power to handle your audio projects.
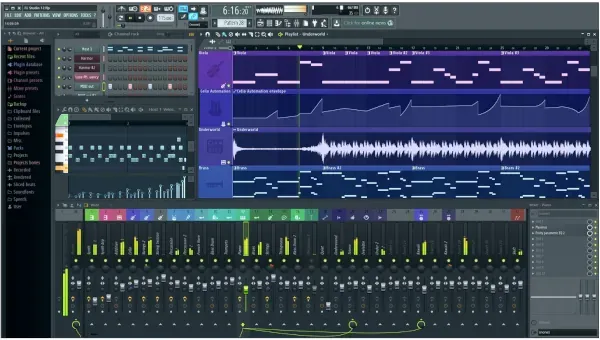
- A digital audio workstation (DAW). This is the software that you will use to record, edit, and mix your audio tracks. You should have a DAW that is user-friendly, versatile, and powerful. You should also have a DAW that supports your audio format, sample rate, and bit depth. Some of the most popular and widely used DAWs are Pro Tools, Logic Pro, Ableton Live, FL Studio, and GarageBand.
As an Amazon Associate I earn from qualifying purchases.
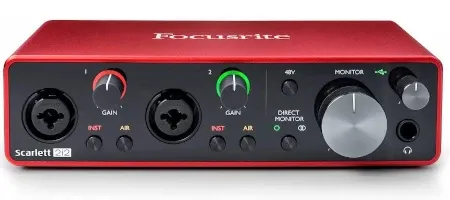
- An audio interface. This is the device that connects your computer to your microphones, instruments, speakers, and headphones. You should have an audio interface that has enough inputs and outputs for your needs, as well as high-quality preamps, converters, and drivers. You should also have an audio interface that supports your audio format, sample rate, and bit depth. Some of the most popular and widely used audio interfaces are Focusrite Scarlett, Presonus AudioBox, M-Audio M-Track, and Behringer U-Phoria.
As an Amazon Associate I earn from qualifying purchases.
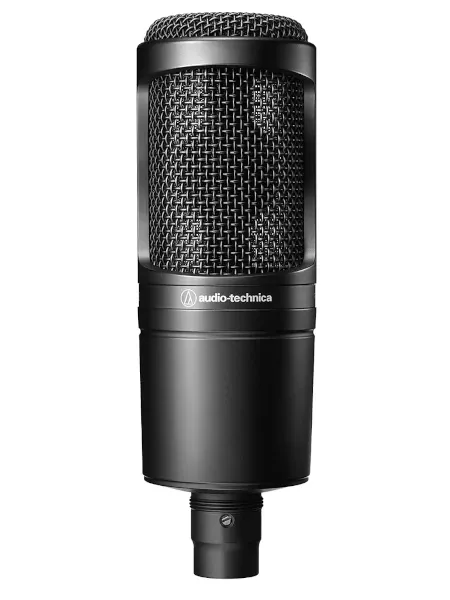
- A microphone. This is the device that captures the sound of your voice, instruments, or other sources. You should have a microphone that suits your style, genre, and purpose. You should also have a microphone that has a good frequency response, sensitivity, and polar pattern. Some of the most popular and widely used microphones are Shure SM57, Shure SM58, Audio Technica AT2020, Rode NT1-A, and AKG C214.
As an Amazon Associate I earn from qualifying purchases.
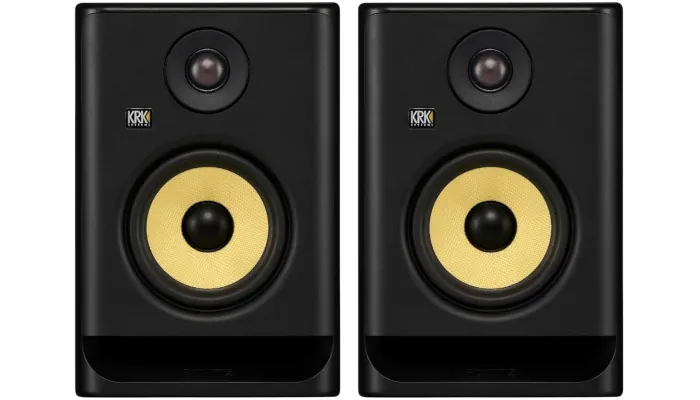
- A pair of speakers or monitors. This is the device that plays back the sound of your recordings and mixes. You should have a pair of speakers or monitors that are accurate, balanced, and clear. You should also have a pair of speakers or monitors that are suitable for your room size, shape, and acoustics. Some of the most popular and widely used speakers or monitors are KRK Rokit, Yamaha HS, JBL LSR, and Mackie CR.
As an Amazon Associate I earn from qualifying purchases.
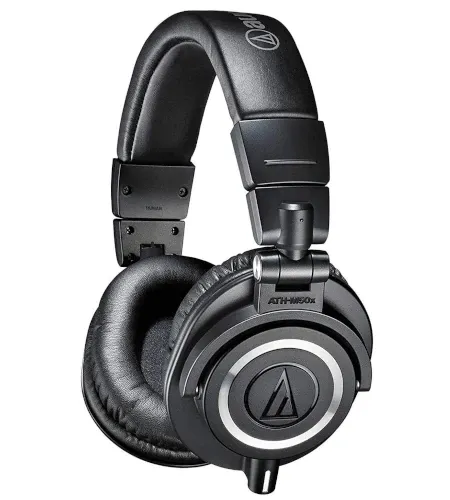
- A pair of headphones. This is the device that allows you to listen to your recordings and mixes without disturbing others or being disturbed by others. You should have a pair of headphones that are comfortable, durable, and isolating. You should also have a pair of headphones that have a good frequency response, impedance, and sensitivity. Some of the most popular and widely used headphones are Audio-Technica ATH-M50x, Sennheiser HD 280 Pro, Sony MDR-7506, and Beyerdynamic DT 770 Pro.
Composing Music

Music is a form of art that expresses emotions, ideas, and stories through sounds and rhythms. Music can be created in many different ways, using various instruments, techniques, and genres. However, behind every musical piece, there is a common element that defines its structure, logic, and harmony: musical theory.
Musical theory is the study of how music works, how it is organized, and how it can be manipulated. Musical theory can help you to understand the basic components of music, such as notes, scales, chords, intervals, and keys. It can also help you to create your own music, by applying rules, patterns, and formulas that can generate melodies, harmonies, and progressions.
One of the most fundamental concepts of musical theory is the note. A note is a sound that has a specific pitch and duration. A pitch is how high or low a sound is, and it is measured in hertz (Hz), which is the number of vibrations per second. A duration is how long a sound lasts, and it is measured in beats, which are the units of time in music. A note can be represented by a letter, from A to G, and by a symbol, such as a whole note, a half note, a quarter note, etc.
Another essential concept of musical theory is the scale. A scale is a collection of notes that are arranged in a specific order and pattern. A scale can be used to create melodies, which are sequences of notes that form the main theme or tune of a musical piece. There are many types of scales, but the most common and basic one is the major scale. A major scale consists of seven notes that follow a specific interval pattern: whole step, whole step, half step, whole step, whole step, whole step, half step. A whole step is the distance between two notes that are two semitones apart, and a half step is the distance between two notes that are one semitone apart. A semitone is the smallest interval in music, and it is equal to one fret on a guitar or one key on a piano. For example, the C major scale consists of the notes C, D, E, F, G, A, and B, and it follows the interval pattern W-W-H-W-W-W-H.
A third crucial concept of musical theory is the chord. A chord is a combination of three or more notes that are played at the same time. A chord can be used to create harmonies, which are layers of sounds that support and enrich the melody. There are many types of chords, but the most common and basic one is the triad. A triad is a chord that consists of three notes that are built on the first, third, and fifth degree of a scale. A degree is the position of a note in a scale, and it is numbered from one to seven. For example, the C major triad consists of the notes C, E, and G, which are the first, third, and fifth degree of the C major scale.
A fourth vital concept of musical theory is the progression. A progression is a series of chords that are played in a specific order and pattern. A progression can be used to create the structure, mood, and direction of a musical piece. There are many types of progressions, but the most common and basic one is the diatonic progression. A diatonic progression is a progression that consists of chords that are built on the degrees of a scale. For example, the C major diatonic progression consists of the chords C, Dm, Em, F, G, Am, and Bdim, which are built on the first, second, third, fourth, fifth, sixth, and seventh degree of the C major scale.
By using these four concepts of musical theory, you can create your own music from scratch, using math and logic. You can start by choosing a scale that suits your style and genre, and then use it to create a melody, a harmony, and a progression. You can also experiment with different combinations, variations, and modulations, to create more complex and original songs.
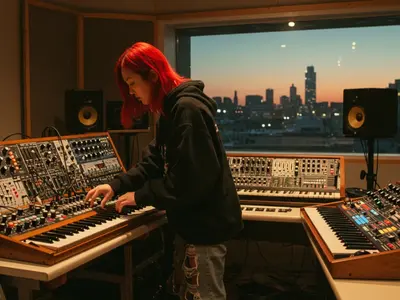
Producing Electronic Music

Electronic music is a genre of music that uses electronic devices, such as synthesizers, drum machines, samplers, and computers, to create sounds and rhythms. Electronic music can be divided into many subgenres, such as techno, house, trance, dubstep, and EDM. Electronic music can be produced in many different ways, using various software, hardware, and techniques. However, behind every electronic music piece, there is a common element that defines its groove, energy, and texture: the beat.
The beat is the rhythmic foundation of electronic music, and it is composed of four main elements: the kick, the snare, the hi-hat, and the bass. The kick is the low-pitched drum sound that provides the pulse and the drive of the beat. The snare is the high-pitched drum sound that provides the accent and the contrast of the beat. The hi-hat is the metallic cymbal sound that provides the subdivision and the syncopation of the beat. The bass is the low-frequency sound that provides the depth and the warmth of the beat.
One of the most popular and widely used software to create electronic music is Ableton Live. Ableton Live is a digital audio workstation (DAW) that allows you to record, edit, and mix your audio tracks. Ableton Live also has a unique feature called the Session View, which allows you to arrange your audio clips in a grid-like layout, and trigger them in real time, using a mouse, a keyboard, or a controller. This feature makes Ableton Live ideal for producing electronic music, as you can experiment with different combinations, variations, and effects, and create dynamic and spontaneous performances.
To produce electronic music using Ableton Live, you need to follow these basic steps:
- Create a new project and set the tempo, the time signature, and the key of your song. The tempo is the speed of your song, measured in beats per minute (BPM). The time signature is the number of beats per measure and the type of note that gets one beat. The key is the scale that your song is based on. For example, you can set your tempo to 120 BPM, your time signature to 4/4, and your key to C major.
- Create a drum rack and load some drum samples . A drum rack is a device that allows you to play and manipulate multiple drum sounds using a single track. You can load drum samples from the built-in library, or from your own collection, and assign them to different pads on the drum rack. For example, you can load a kick sample on pad C1, a snare sample on pad D1, a hi-hat sample on pad E1, and a bass sample on pad F1.
- Create a MIDI clip and program your drum pattern. A MIDI clip is a file that contains musical information, such as notes, velocities, and durations, that can control a device, such as a drum rack. You can create a MIDI clip by double-clicking on an empty slot on the Session View, and then use the piano roll to draw or record your drum pattern. For example, you can create a simple four-bar drum pattern by placing a kick on the first beat of every measure, a snare on the third beat of every measure, a hi-hat on every eighth note, and a bass on the first and third beat of the first and third measure.
- Create a synth track and load a synth preset. A synth track is a track that allows you to play and manipulate a synthesizer, which is a device that generates and modifies electronic sounds. You can load a synth preset from the built-in library, or from your own collection, and tweak its parameters, such as the oscillator, the filter, the envelope, and the LFO. For example, you can load a synth preset that sounds like a piano, and adjust its attack, decay, sustain, and release.
- Create a MIDI clip and program your synth melody. You can create a MIDI clip by double-clicking on an empty slot on the Session View, and then use the piano roll to draw or record your synth melody. For example, you can create a simple four-bar synth melody by placing notes that belong to the C major scale, and follow the chord progression C, F, G, C.
- Repeat steps 4 and 5 to create more synth tracks and melodies, using different synth presets and patterns. You can also create some effects tracks and load some effects devices, such as reverb, delay, chorus, and distortion, to enhance and modify your sounds. You can also use some automation and modulation to create some movement and variation in your sounds.
- Arrange your clips in the Session View, and trigger them in different orders and combinations, using the scene launch buttons, the clip launch buttons, or the stop buttons. You can also use the mixer to adjust the volume, the pan, and the send levels of your tracks. You can also use the crossfader to blend between two groups of tracks.
- Record your performance in the Arrangement View, and edit and refine it.
Using Online Tools
If you don’t have access to a home studio or a DAW, or if you want to try something different and fun, you can also use online tools to create and record your own music. Online tools are web-based applications that allow you to produce music using your browser and your internet connection. Online tools can offer various features and functions, such as virtual instruments , loops, samples, effects, sequencers, mixers, and editors. Online tools can also enable you to collaborate with other musicians, share your music with your fans, and discover new music from other artists.
There are many online tools that you can choose from, depending on your needs, preferences, and goals. However, here are some of the best online tools that you should check out:
- Soundtrap : Soundtrap is an online tool that allows you to create music and podcasts using a variety of instruments, sounds, and effects. You can also record your voice and your instruments using your microphone or your MIDI controller. Soundtrap also has a collaborative feature that allows you to invite other musicians to join your project and work together in real time. You can also share your music with your friends and followers on social media platforms, such as Facebook, Twitter, and YouTube. Soundtrap is free to use, but you can also upgrade to a premium plan to access more features and sounds.
- BandLab : BandLab is an online tool that allows you to create music and beats using a range of instruments, sounds, and effects. You can also record your voice and your instruments using your microphone or your MIDI controller. BandLab also has a social feature that allows you to connect with other musicians, join communities, and participate in challenges. You can also share your music with your fans and listeners on BandLab, or export it to other platforms, such as SoundCloud, Spotify, and Apple Music. BandLab is free to use, and you can also download the BandLab app for your mobile devices.
- Soundation : Soundation is an online tool that allows you to create music and remixes using a collection of loops, samples, and effects. You can also record your voice and your instruments using your microphone or your MIDI controller. Soundation also has a studio feature that allows you to edit and mix your tracks using a professional DAW interface. You can also share your music with your friends and followers on Soundation, or download it to your computer. Soundation is free to use, but you can also upgrade to a premium plan to access more features and sounds.
- Audiotool : Audiotool is an online tool that allows you to create music and beats using a modular system of devices, such as synthesizers, drum machines, samplers, and effects. You can also record your voice and your instruments using your microphone or your MIDI controller. Audiotool also has a community feature that allows you to collaborate with other musicians, remix their tracks, and join contests. You can also share your music with your fans and listeners on Audiotool, or export it to other platforms, such as SoundCloud, YouTube, and Facebook. Audiotool is free to use, and you can also download the Audiotool app for your mobile devices.
These are some of the best online tools that you can use to create and record your own music. However, you should also keep in mind that online tools have some limitations and disadvantages, such as:
- Online tools require a stable and fast internet connection, which may not be available or accessible at all times and places.
- Online tools may not have all the features and functions that you need or want, such as advanced editing, mixing, and mastering tools, or a wide range of instruments, sounds, and effects.
- Online tools may not be compatible or integrable with your other software and hardware, such as your DAW, your audio interface, or your MIDI controller.
- Online tools may not offer the same quality and security as offline software and hardware, such as the sound quality, the file format, the storage space, and the data protection.
Therefore, you should consider the pros and cons of using online tools, and decide whether they suit your needs, preferences, and goals. You should also experiment with different online tools, and find the ones that work best for you and your music.
Conclusion
In this post, I have shown you how to create and record your own music at home, using simple and affordable tools and techniques. You have learned how to build a home studio, compose music, produce electronic music, and use online tools. You have also learned some basic concepts of musical theory and some popular and widely used software and hardware for music production.
By following these steps, you will be able to produce high-quality music in the comfort of your home and launch your musical career with confidence and enthusiasm. You will also be able to express your emotions, ideas, and stories through sounds and rhythms, and share them with the world.
I hope you have enjoyed this post and found it useful and inspiring. If you have any questions, comments, or suggestions, please feel free to leave them in the comments section below or on my social media platforms. I would love to hear from you and see your musical creations.
Thank you for reading and happy music making!
Rodrigo Marques
Rodrigo Marques, founder of Home Studio Start, is a music production veteran with over 25 years of experience. Since 1997, he has mastered tools like Sound Forge, Samplitude Pro, and VST plugins, producing albums for emerging artists globally. Creator of the innovative Formula HSS for mixing and mastering, Rodrigo has empowered thousands through online courses and his ebook, Home Studio Start. Dedicated to democratizing music production, he equips aspiring artists with skills for professional-grade music and sustainable careers.
About the author