Do you want to record quality audio through your smartphone, or have you recorded something and just want to improve that sound? If you answered yes, then this blog post is for you. In this post, I will share with you some of the best tips and tricks on how to improve your smartphone audio, so you can make your videos sound more professional and engaging.
I am a music blogger and I have been recording and editing audio with my smartphone for years. I know how challenging it can be to capture good sound with a small device that is not designed for audio production. But I also know that it is possible to achieve great results with some simple adjustments and tools.
In this post, you will learn:
- Why smartphone audio matters and how it can affect the quality and impact of your videos
- How to prepare the environment for recording and avoid common audio problems
- How to choose the right microphone for your smartphone and enhance your sound quality
- How to record and edit your smartphone audio with the best apps and software
By the end of this post, you will have a clear understanding of how to improve your smartphone audio and make your videos stand out from the crowd. Whether you are recording a podcast, an interview, a song, or a vlog, you will find something useful and valuable in this post.So, are you ready to improve your smartphone audio? Let’s get started!
Why Smartphone Audio Matters
You may be wondering why smartphone audio matters so much. After all, you are not a professional audio engineer or a musician. You just want to record some videos with your smartphone and share them with your friends, family, or followers. Why should you care about the sound quality of your videos?
Well, the answer is simple: because your audience cares. And so should you.
According to a study by the University of Southern California, sound quality is more important than video quality for online video viewers. The study found that viewers are more likely to watch, like, comment, and share videos that have good sound quality, regardless of the video quality. On the other hand, viewers are more likely to abandon, dislike, and ignore videos that have poor sound quality, even if the video quality is high.
This means that if you want to make your videos more engaging and impactful, you need to pay attention to your smartphone audio. Good smartphone audio can:
- Enhance the clarity and intelligibility of your voice or music
- Convey the emotion and tone of your message or story
- Create a sense of immersion and realism for your viewers
- Increase the credibility and authority of your content
- Boost the SEO and ranking of your videos on search engines and platforms
On the contrary, bad smartphone audio can:
- Distract and annoy your viewers with noise and distortion
- Confuse and mislead your viewers with unclear and muffled speech or music
- Reduce the interest and attention of your viewers with dull and flat sound
- Damage the reputation and trustworthiness of your content
- Lower the visibility and reach of your videos on search engines and platforms
As you can see, smartphone audio matters a lot for your video success. But how can you improve your smartphone audio? What are some of the common challenges and problems that you may face when recording audio with your smartphone? And how can you overcome them?
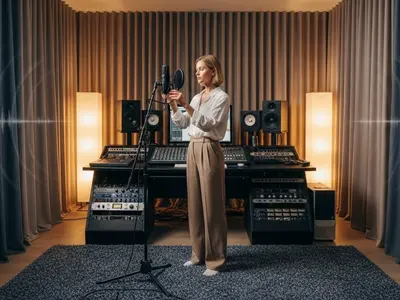
#01 - How to Prepare the Environment for Recording

One of the most important factors that can affect your smartphone audio quality is the environment where you record. The environment can introduce unwanted sounds and noises that can interfere with your voice or music, and make your audio sound unprofessional and unpleasant.
Therefore, before you start recording, you need to prepare the environment and make sure that it is suitable for your audio production. Here are some tips and advice on how to do that:
- Choose a quiet and isolated location. Avoid places that have a lot of background noise, such as traffic, construction, people talking, or animals. If possible, choose a room that has a door and a window that you can close to block out any external sounds. You can also use a sign or a note to inform others that you are recording and ask them not to disturb you.
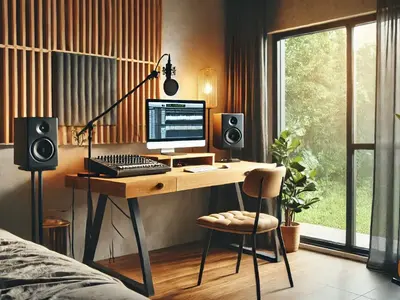
- Reduce the reverberation and echo. Reverberation and echo are the reflections of sound waves that bounce off the walls, ceiling, floor, and other surfaces in the room. They can create a hollow and distant sound that can make your audio sound unclear and muffled. To reduce the reverberation and echo, you can use soft and absorbent materials, such as carpets, curtains, blankets, pillows, or foam panels, to cover the hard and reflective surfaces in the room. You can also use furniture, books, or plants to create some irregularities and break up the sound waves.
- Adjust the lighting and temperature. Lighting and temperature can also affect your smartphone audio quality. Too much or too little light can cause your smartphone to overheat or underperform, which can affect the microphone and the battery. Too high or too low temperature can also affect your voice and your comfort. Therefore, you should adjust the lighting and temperature to a moderate and comfortable level. You can use natural or artificial light sources, such as lamps, candles, or LED lights, to create a suitable ambiance. You can also use fans, heaters, or air conditioners to regulate the temperature, but make sure that they are not too loud or too close to the microphone.
- Set up the equipment and test the sound. Finally, you need to set up the equipment and test the sound before you start recording. You need to position your smartphone and your microphone in a way that can capture the best sound quality. You also need to adjust the volume and the settings of your smartphone and your recording app or software . You can use headphones or earphones to monitor the sound and check for any problems or issues. You can also do a test recording and listen to it carefully to see if you need to make any changes or improvements.
By following these steps, you can prepare the environment for recording and avoid some of the common audio problems that can ruin your smartphone audio.
#02 - How to Choose the Right Microphone for Your Smartphone
Another factor that can affect your smartphone audio quality is the microphone that you use. The microphone is the device that converts the sound waves into electrical signals that can be recorded and processed by your smartphone. The quality and type of the microphone can have a significant impact on the sound quality of your voice or music.
The problem is that most smartphones have built-in microphones that are not very good for audio production . They are usually small, low-quality, and omnidirectional, which means that they pick up sound from all directions, including the noise and the reverberation. They are also located in inconvenient places, such as the bottom or the back of the smartphone, which can cause problems with the positioning and the distance of the microphone from the sound source.
Therefore, if you want to improve your smartphone audio, you may want to consider using an external microphone that can connect to your smartphone. An external microphone can offer you several benefits, such as:
- Better sound quality and clarity
- More control and flexibility over the sound capture
- More options and features for different types of recording
- More compatibility and versatility with different smartphones and apps
But how do you choose the right microphone for your smartphone? What are some of the factors that you need to consider when buying or using an external microphone? And what are some of the best microphones for smartphone audio that you can find on the market?In this section, I will answer these questions and help you choose the right microphone for your smartphone. Here are some of the aspects that you need to consider:
- The type of microphone. There are different types of microphones that have different characteristics and functions. The most common types of microphones are dynamic, condenser, and lavalier. Dynamic microphones are durable and versatile, and they can handle loud sounds and high pressure levels. They are good for recording vocals , instruments, and live performances. Condenser microphones are sensitive and accurate, and they can capture subtle sounds and details. They are good for recording voice-overs, podcasts, and interviews. Lavalier microphones are small and discreet, and they can be clipped to your clothing or attached to your body. They are good for recording speech, dialogue, and narration.
- The polar pattern of the microphone. The polar pattern of the microphone is the directionality of the microphone, or how it picks up sound from different angles. The most common polar patterns are cardioid, supercardioid, omnidirectional, and bidirectional. Cardioid microphones pick up sound from the front and reject sound from the sides and the back. They are good for recording solo voices or instruments, and reducing background noise. Supercardioid microphones pick up sound from the front and a little bit from the back, and reject sound from the sides. They are good for recording focused voices or instruments, and isolating sound sources. Omnidirectional microphones pick up sound from all directions equally. They are good for recording ambient sounds, group voices, or multiple sound sources. Bidirectional microphones pick up sound from the front and the back, and reject sound from the sides. They are good for recording duets, interviews, or conversations.
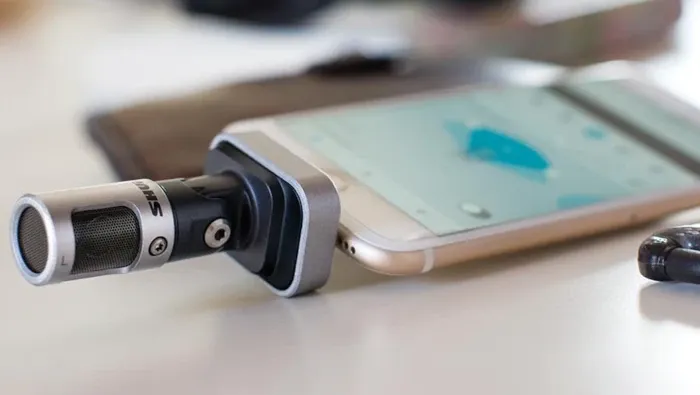
- The connection and compatibility of the microphone. The connection and compatibility of the microphone are the ways that the microphone can connect to your smartphone and work with your smartphone and your recording app or software. The most common connections are 3.5 mm jack, USB, and Bluetooth. 3.5 mm jack microphones can plug into the headphone jack of your smartphone, but they may require an adapter or a splitter if your smartphone does not have a dedicated microphone jack. USB microphones can plug into the USB port of your smartphone, but they may require a converter or a hub if your smartphone does not have a standard USB port. Bluetooth microphones can connect wirelessly to your smartphone, but they may have issues with battery life, latency, or interference. You also need to check if your microphone is compatible with your smartphone model, your operating system, and your recording app or software.
Based on these factors, you can choose the right microphone for your smartphone and your recording needs. To help you with your decision, here are some of the best microphones for smartphone audio that you can find on the market:
- Shure MV88 : This is a condenser microphone that has a cardioid polar pattern and a 3.5 mm jack connection. It is designed to plug directly into your smartphone and rotate up to 90 degrees for optimal positioning. It has a frequency range of 20 Hz to 20 kHz and a maximum sound pressure level of 120 dB. It also comes with a windscreen, a carrying case, and a free app that allows you to adjust the gain, the equalization, the compression, and the stereo width of your audio. It is compatible with iOS devices and some Android devices.
- Rode VideoMic Me: This is a dynamic microphone that has a cardioid polar pattern and a 3.5 mm jack connection. It is designed to attach to the headphone jack of your smartphone and fit snugly on the edge of your smartphone. It has a frequency range of 100 Hz to 20 kHz and a maximum sound pressure level of 140 dB. It also comes with a furry windshield, a rubber mount, and a headphone output that allows you to monitor your audio. It is compatible with most smartphones and tablets.
- Sennheiser Memory Mic: This is a lavalier microphone that has an omnidirectional polar pattern and a Bluetooth connection. It is designed to clip to your clothing or attach to your body and record wirelessly to your smartphone. It has a frequency range of 100 Hz to 20 kHz and a maximum sound pressure level of 119 dB. It also comes with a magnetic clip, a USB cable, and a free app that allows you to sync your audio and video, and adjust the audio level and the mixing ratio of your audio. It is compatible with iOS and Android devices.
These are some of the best microphones for smartphone audio that you can find on the market. Of course, there are many other options and models that you can explore and compare, depending on your budget, preference, and availability. The important thing is to choose a microphone that suits your smartphone and your recording needs, and that can improve your smartphone audio quality.
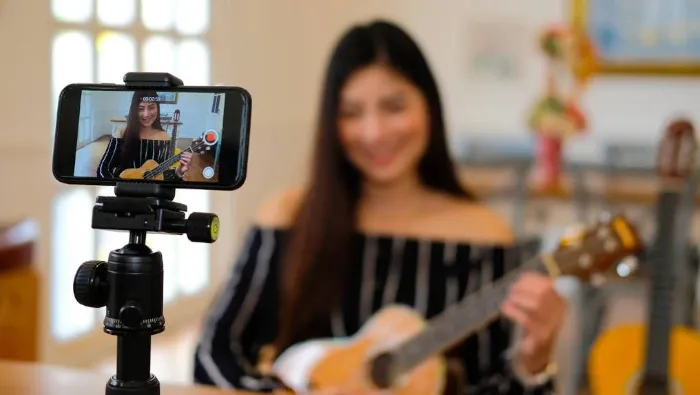
#03 - How to Record and Edit Your Smartphone Audio
Now that you have prepared the environment and chosen the right microphone for your smartphone, you are ready to record and edit your smartphone audio. Recording and editing are the processes of capturing and modifying the sound signals that are produced by your voice or music. Recording and editing can help you improve the quality, clarity, and consistency of your smartphone audio.
But how do you record and edit your smartphone audio? What are some of the steps and techniques that you need to follow when recording and editing your smartphone audio? And what are some of the best apps and software that you can use to record and edit your smartphone audio?
In this section, I will answer these questions and show you how to record and edit your smartphone audio with the best apps and software. Here are some of the steps and techniques that you need to follow:
- Set the volume and the settings. Before you start recording, you need to set the volume and the settings of your smartphone and your recording app or software. You need to make sure that the volume is not too high or too low, as this can cause distortion or noise in your audio. You also need to check the settings of your recording app or software, such as the sample rate, the bit rate, the format, and the channels. You need to choose the settings that match your microphone and your recording needs, and that can produce the best sound quality and compatibility for your audio.
- Position the microphone and the smartphone. Next, you need to position the microphone and the smartphone in a way that can capture the best sound quality. You need to consider the distance, the angle, and the orientation of the microphone and the smartphone. You need to place the microphone close enough to the sound source, but not too close, as this can cause clipping or popping in your audio. You also need to angle the microphone towards the sound source, but not directly, as this can cause plosives or sibilance in your audio. You also need to orient the microphone and the smartphone according to the polar pattern of the microphone, and avoid any movements or vibrations that can cause noise or interference in your audio.
- Monitor the sound and the recording. During the recording, you need to monitor the sound and the recording of your smartphone audio. You need to use headphones or earphones to listen to the sound and check for any problems or issues in your audio. You also need to watch the recording of your smartphone audio and check for any errors or glitches in your audio. You need to adjust the volume, the position, or the settings of your microphone and your smartphone if you notice any problems or issues in your sound or your recording.
- Edit and enhance the audio. After the recording, you need to edit and enhance the audio of your smartphone audio. Editing and enhancing are the processes of trimming, cutting, splitting, merging, fading, or adjusting the audio of your smartphone audio. Editing and enhancing can help you remove any unwanted parts, noises, or silences in your audio, and improve the loudness, the balance, the tone, or the effects of your audio.
To record and edit your smartphone audio, you need to use some apps or software that can help you with these processes. There are many apps and software that you can use to record and edit your smartphone audio, depending on your preference, availability, and budget. Some of the best apps and software that you can use are:
- GarageBand: This is a free app that you can use to record and edit your smartphone audio on iOS devices. It is a powerful and versatile app that allows you to record, edit, mix, and share your audio with ease. It has a user-friendly interface and a variety of features and tools, such as virtual instruments, loops, effects, filters, and plugins. It also supports multiple tracks, layers, and formats, and allows you to export your audio to different platforms and devices.
- Audacity : This is a free software that you can use to record and edit your smartphone audio on Windows, Mac, or Linux devices. It is a popular and reliable software that allows you to record, edit, enhance, and analyze your audio with precision. It has a simple and intuitive interface and a wide range of features and tools, such as noise reduction, equalization, compression, normalization, and spectrogram. It also supports multiple tracks, formats, and plugins, and allows you to export your audio to different platforms and devices.
- WavePad: This is a paid app that you can use to record and edit your smartphone audio on Android or iOS devices. It is a professional and comprehensive app that allows you to record, edit, improve, and share your audio with quality. It has a sleek and sophisticated interface and a rich selection of features and tools, such as trimming, cutting, splitting, merging, fading, amplifying, pitch shifting, reverb, and echo. It also supports multiple tracks, formats, and effects, and allows you to export your audio to different platforms and devices.
These are some of the best apps and software that you can use to record and edit your smartphone audio. Of course, there are many other options and alternatives that you can explore and compare, depending on your needs, preferences, and availability. The important thing is to use an app or software that suits your smartphone and your recording and editing needs, and that can improve your smartphone audio quality.
Conclusion
In this blog post, I have shown you how to improve your smartphone audio, so you can make your videos sound more professional and engaging. You have learned:
- Why smartphone audio matters and how it can affect the quality and impact of your videos
- How to prepare the environment for recording and avoid common audio problems
- How to choose the right microphone for your smartphone and enhance your sound quality
- How to record and edit your smartphone audio with the best apps and software
- How to optimize your smartphone audio for SEO and reach more audience
By following these tips and tricks, you can improve your smartphone audio and make your videos stand out from the crowd. Whether you are recording a podcast, an interview, a song, or a vlog, you can find something useful and valuable in this post.
I hope you enjoyed this blog post and learned something new and helpful. If you did, please share it with your friends, family, or followers, and let me know what you think in the comments below. I would love to hear your feedback and suggestions.
If you have any questions or doubts about smartphone audio, please feel free to contact me anytime. I am happy to assist you and answer your queries.
Thank you for reading and happy recording!
Rodrigo Marques
Rodrigo Marques, founder of Home Studio Start, is a music production veteran with over 25 years of experience. Since 1997, he has mastered tools like Sound Forge, Samplitude Pro, and VST plugins, producing albums for emerging artists globally. Creator of the innovative Formula HSS for mixing and mastering, Rodrigo has empowered thousands through online courses and his ebook, Home Studio Start. Dedicated to democratizing music production, he equips aspiring artists with skills for professional-grade music and sustainable careers.
About the author